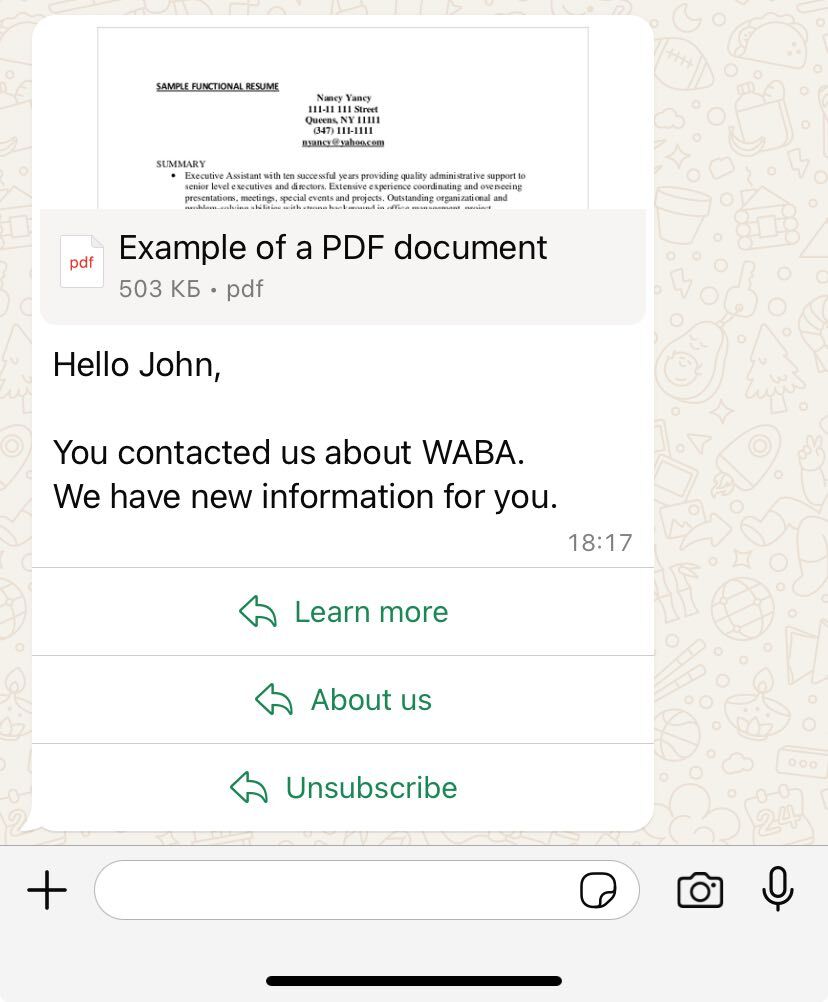
1. Prepare the following text for sending
[template]
[type]document[/type]
[id]Gupshup temp ID[/id]
[document]Document link[/document]
[filename]Title of the document[/filename]
[var]Variable 1[/var]
[var]Variable 2[/var]
[var]Variable 3[/var]
[/template]
Inside the [id][/id] tag, insert your Gupshup temp ID.
Inside the [document][/document] tag, insert a link to the document.
Use the [var][/var] tags to designate as many variables as are created in your template.
Inside the [document][/document] tag, insert a link to the document.
Use the [var][/var] tags to designate as many variables as are created in your template.
2. How to get Gupshup temp ID
1. Open the Gupshup dashboard: https://www.gupshup.io/whatsapp/dashboard
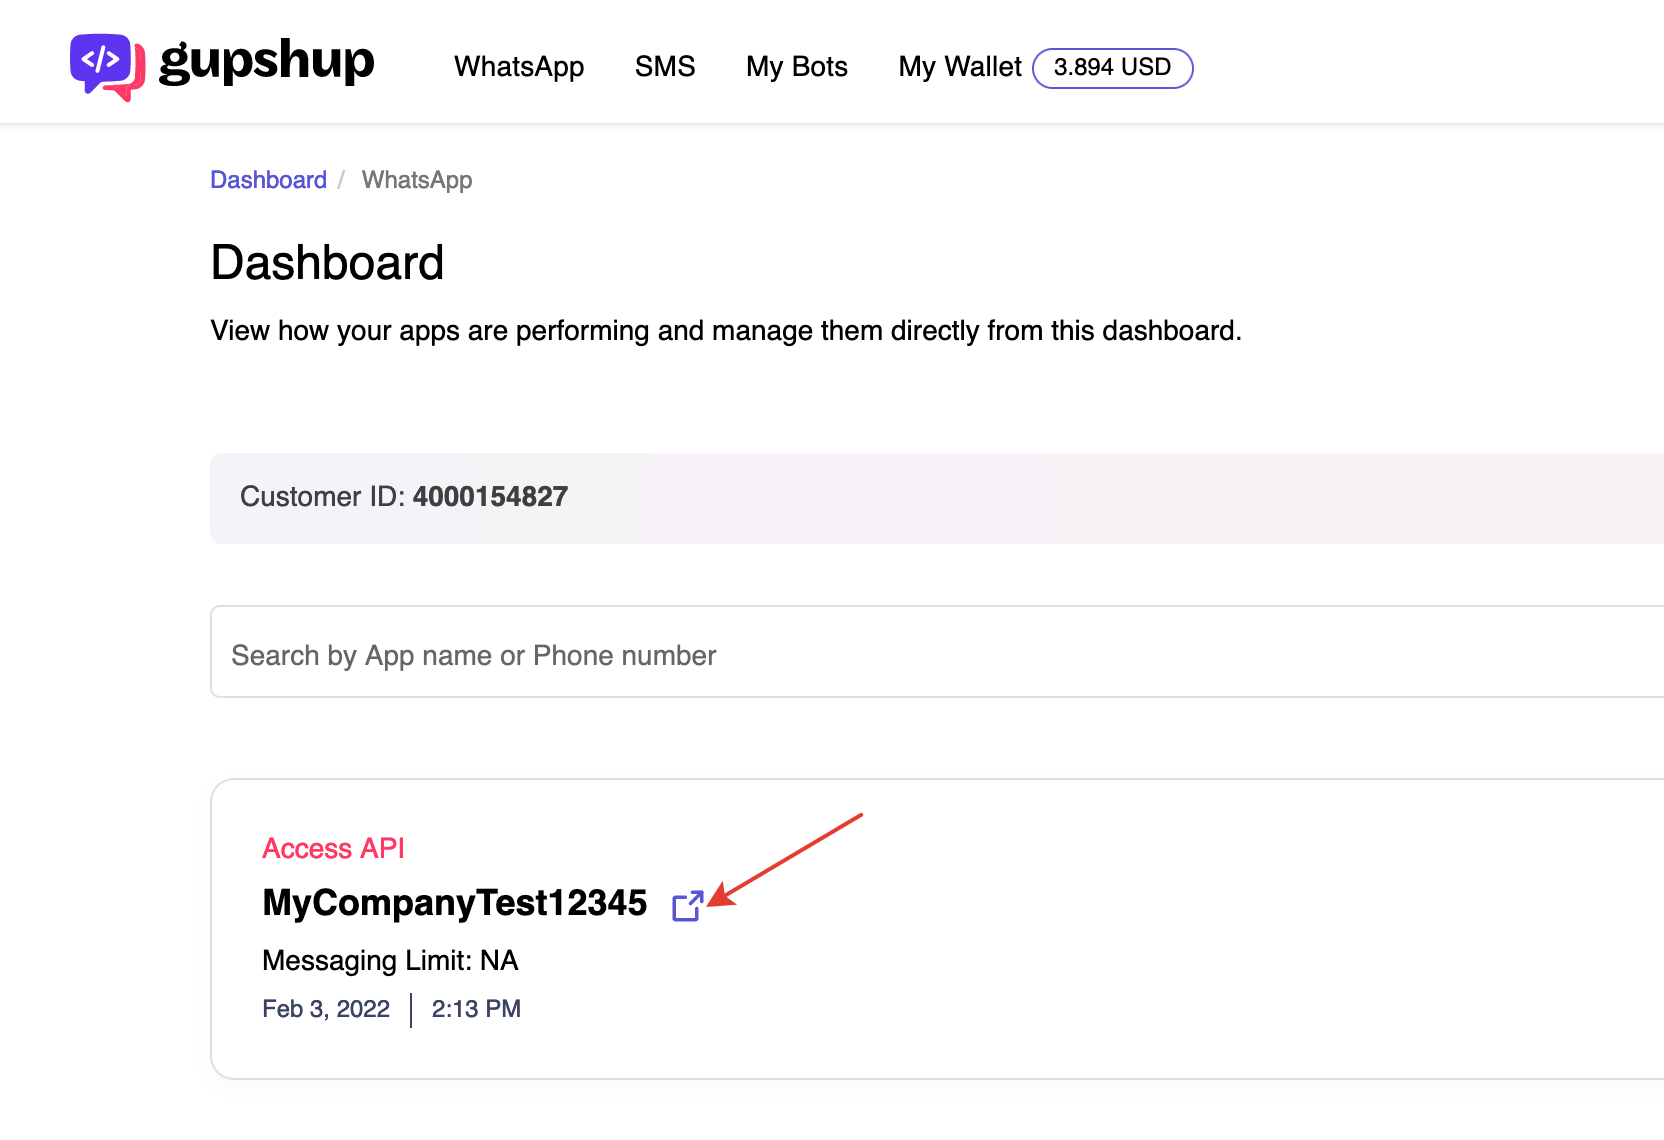
2. Click on the name of your Gupshup App to go to settings:
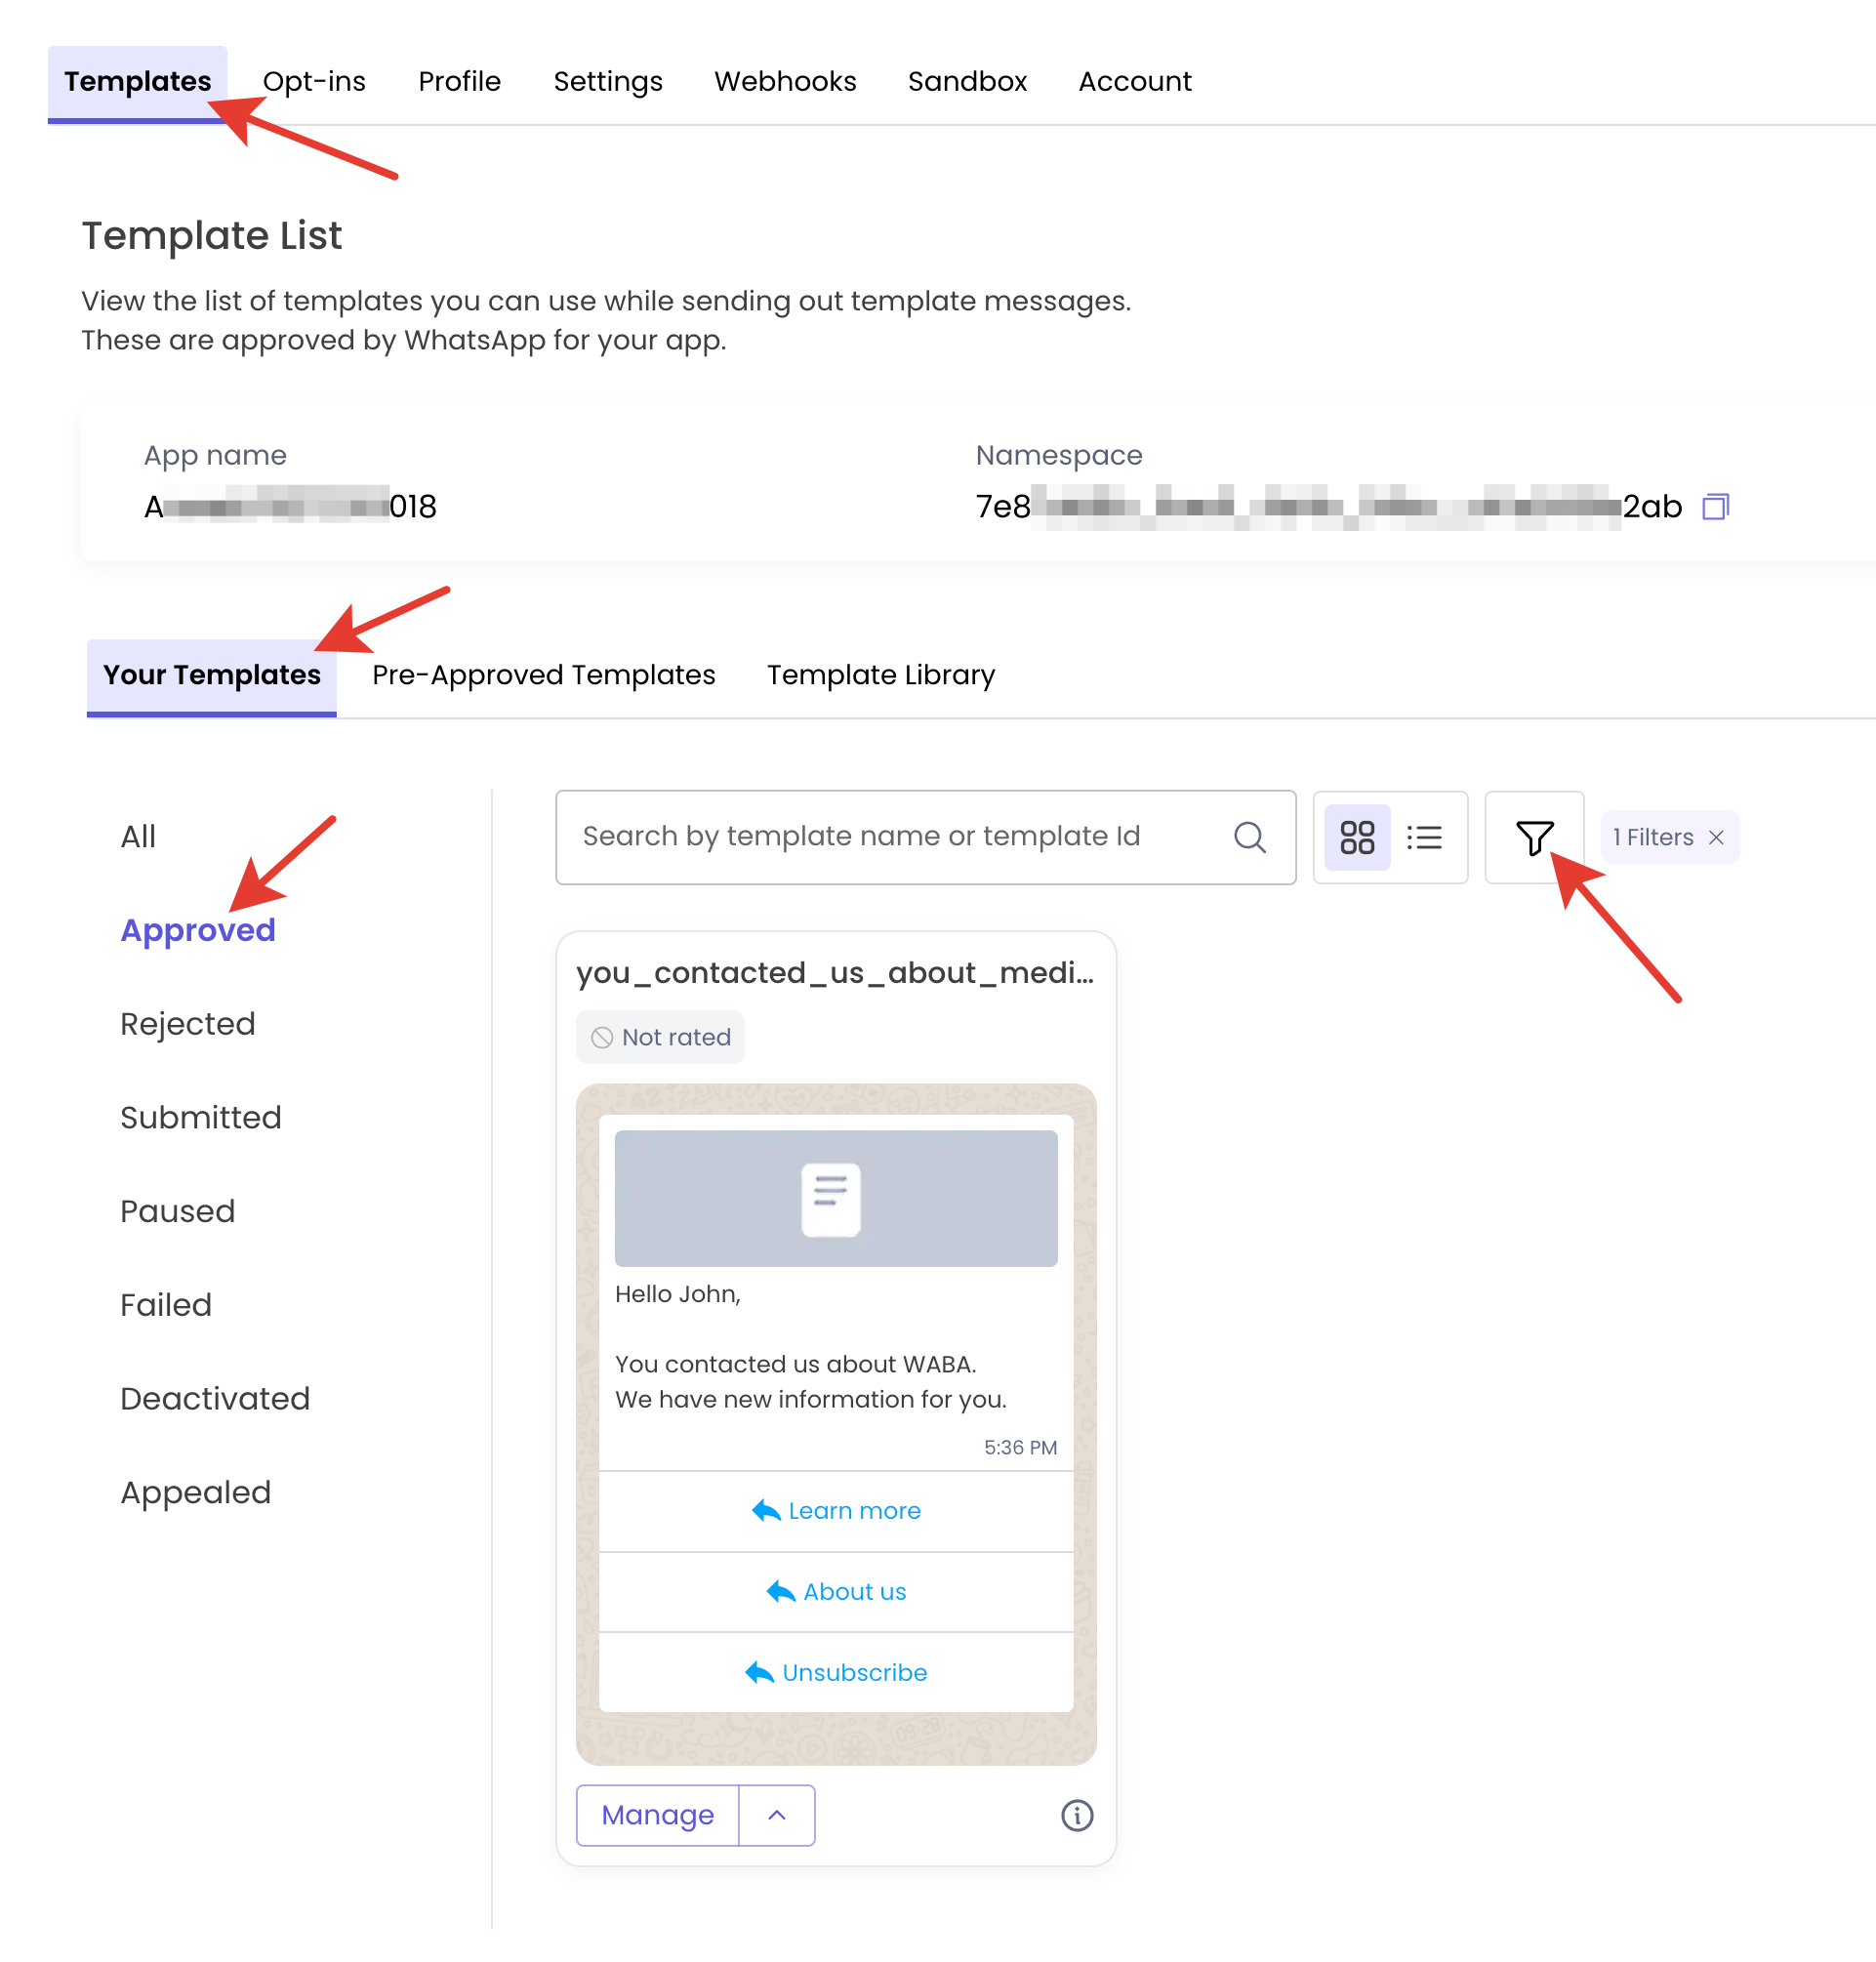
3. Open the list of your approved templates and click on the filter icon:
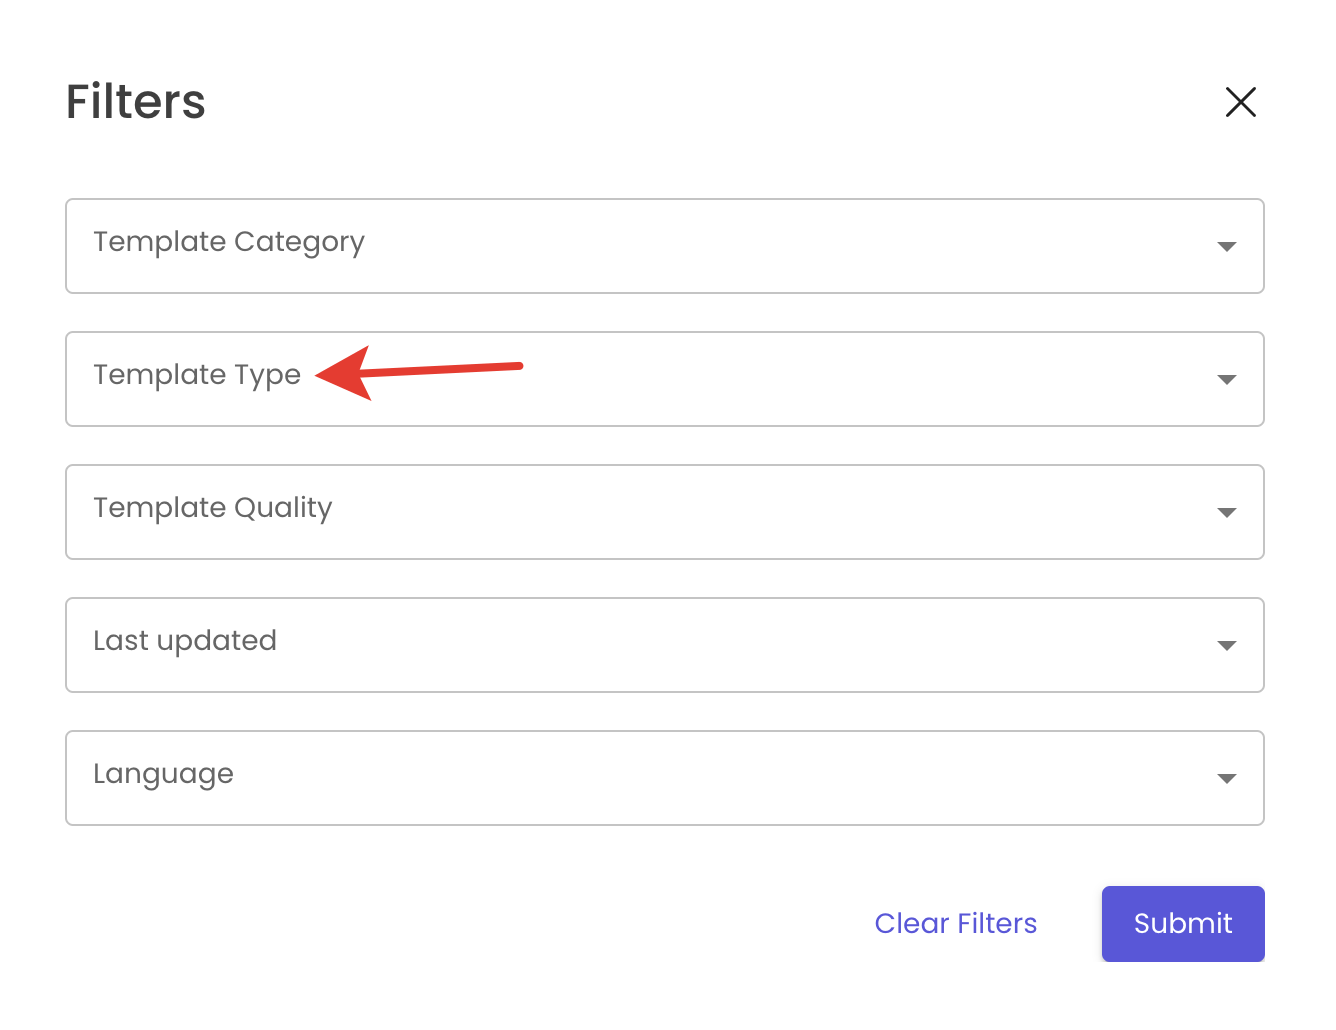
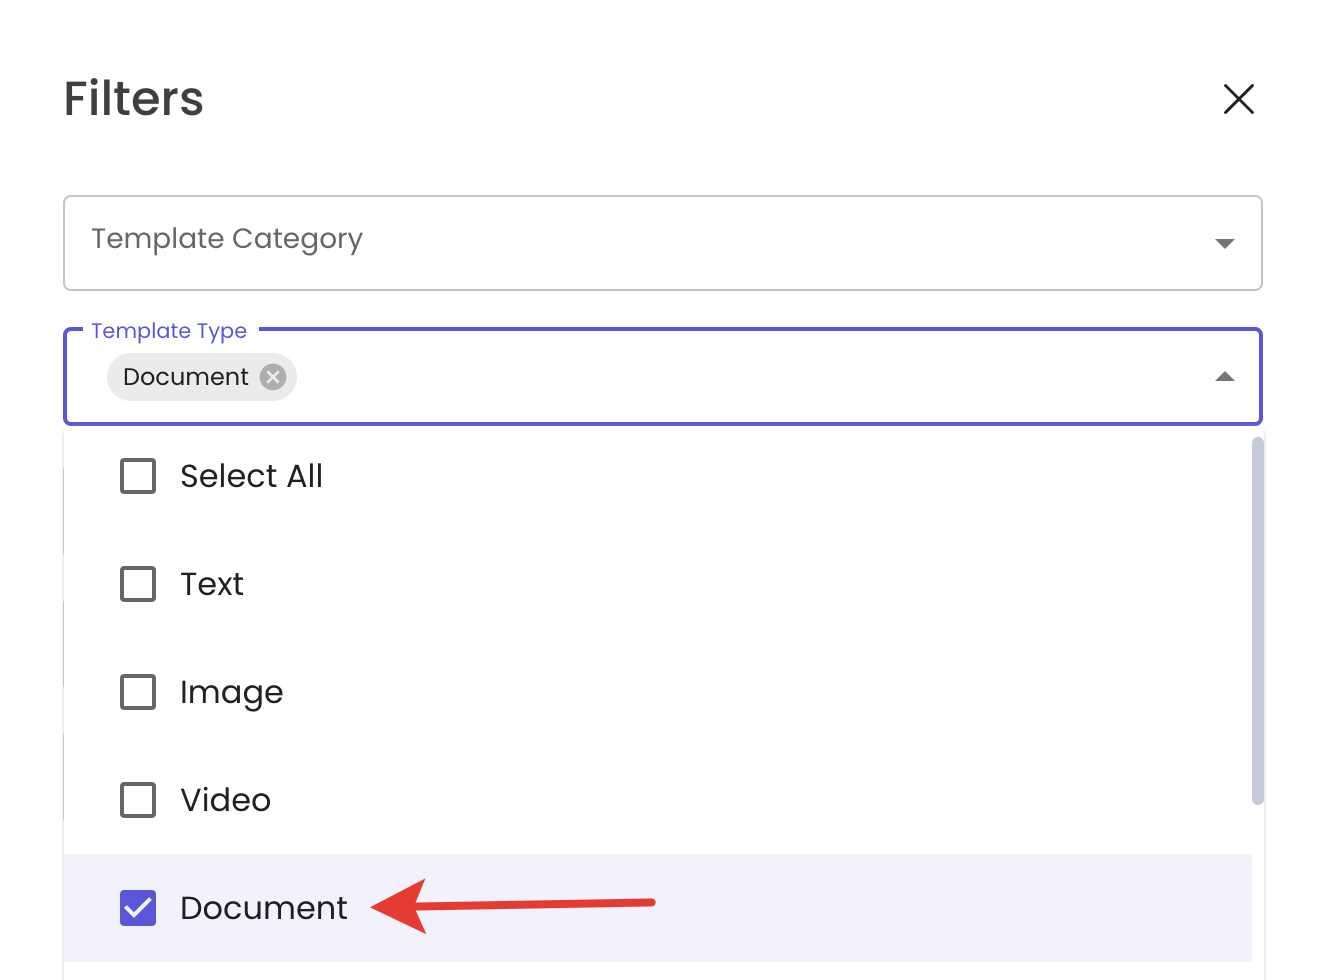
4. Set in the Filter Template Type: Document
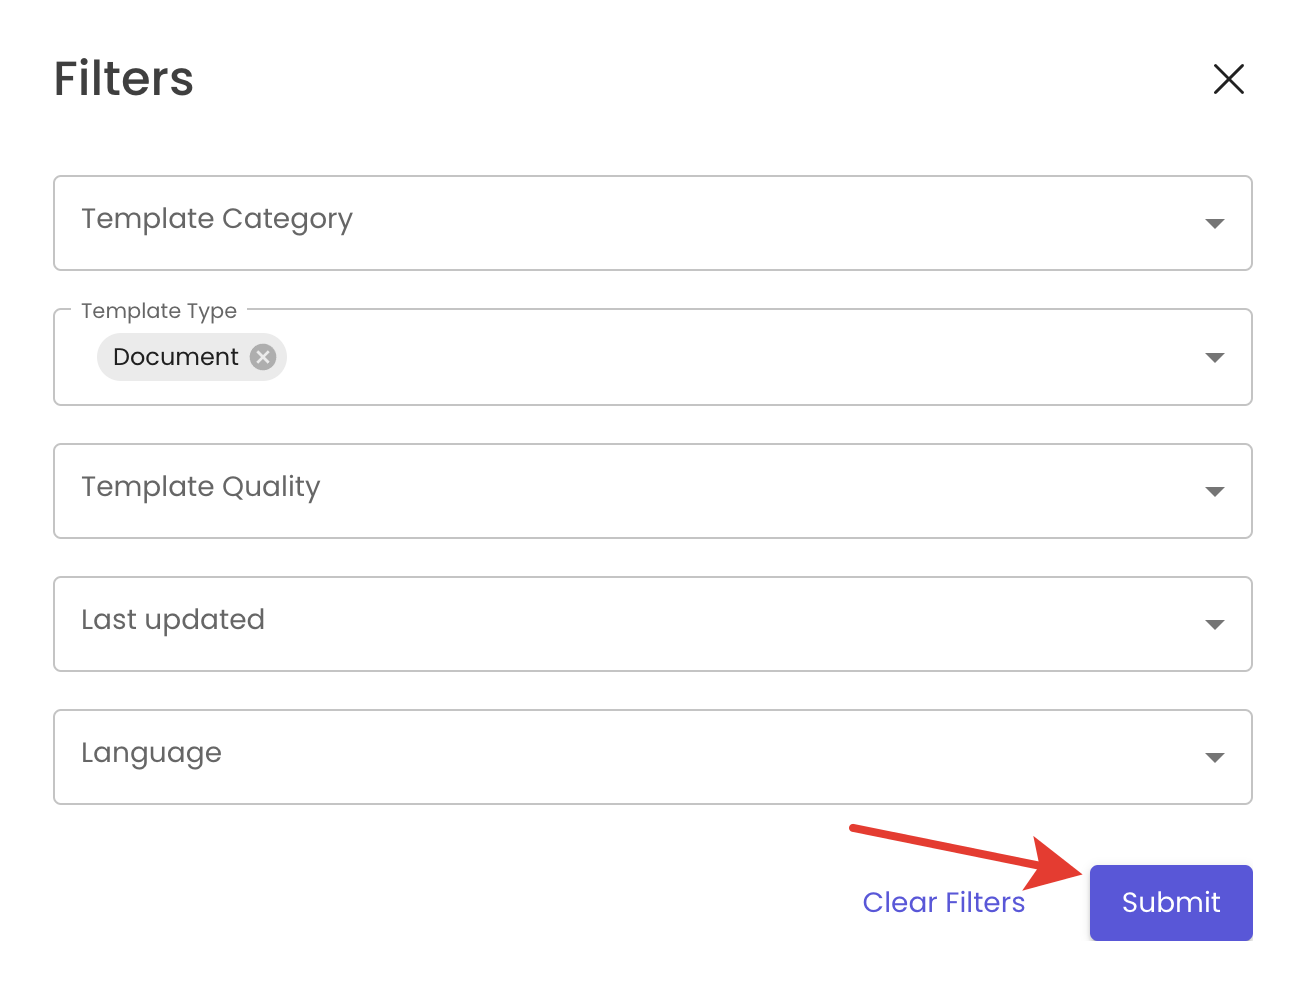
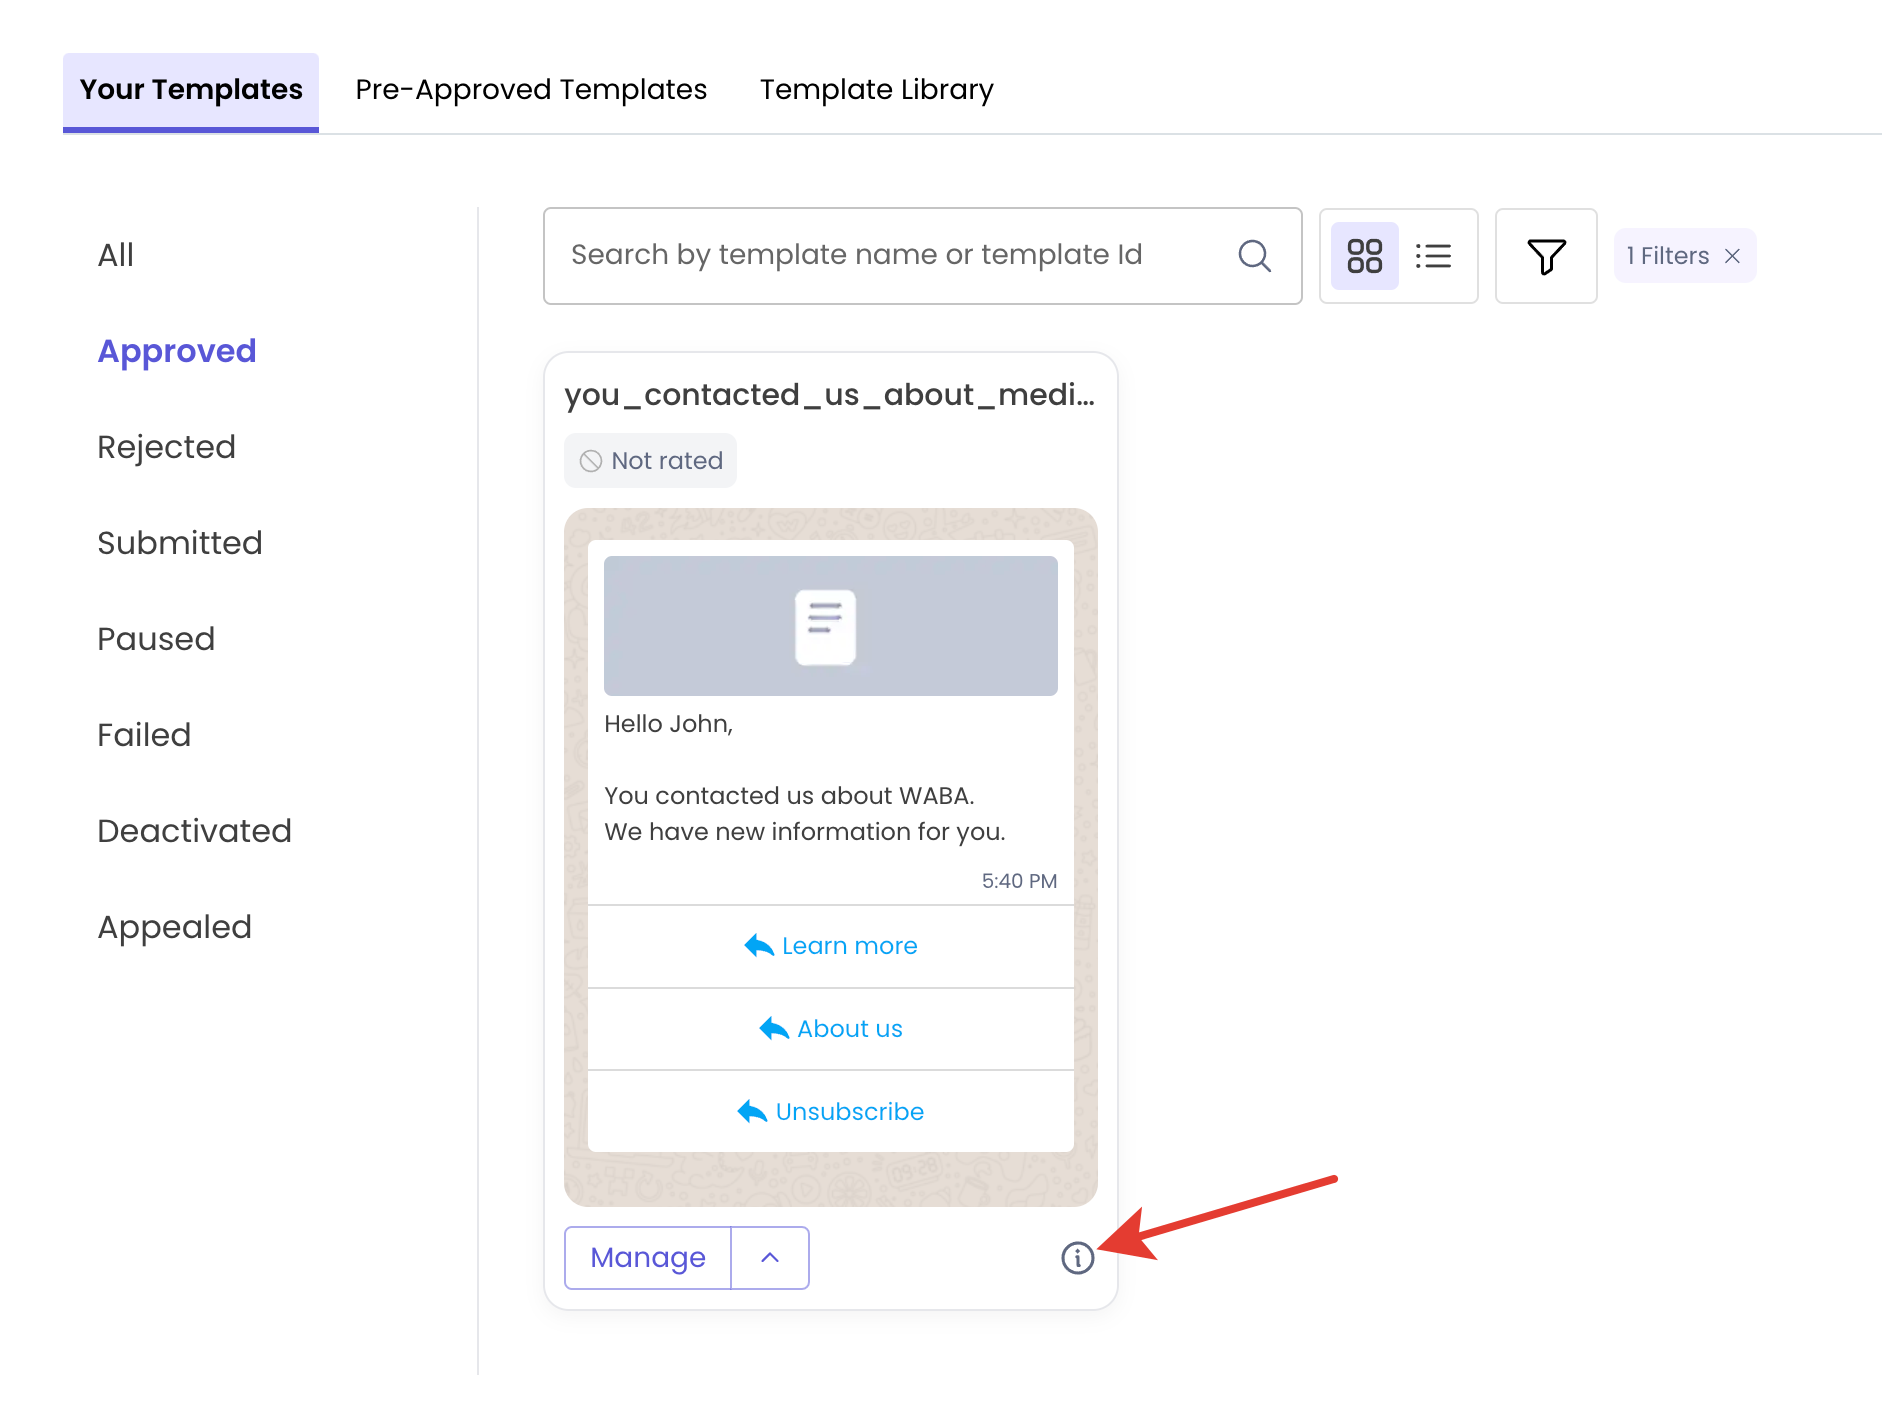
5. Click on the "i" icon:
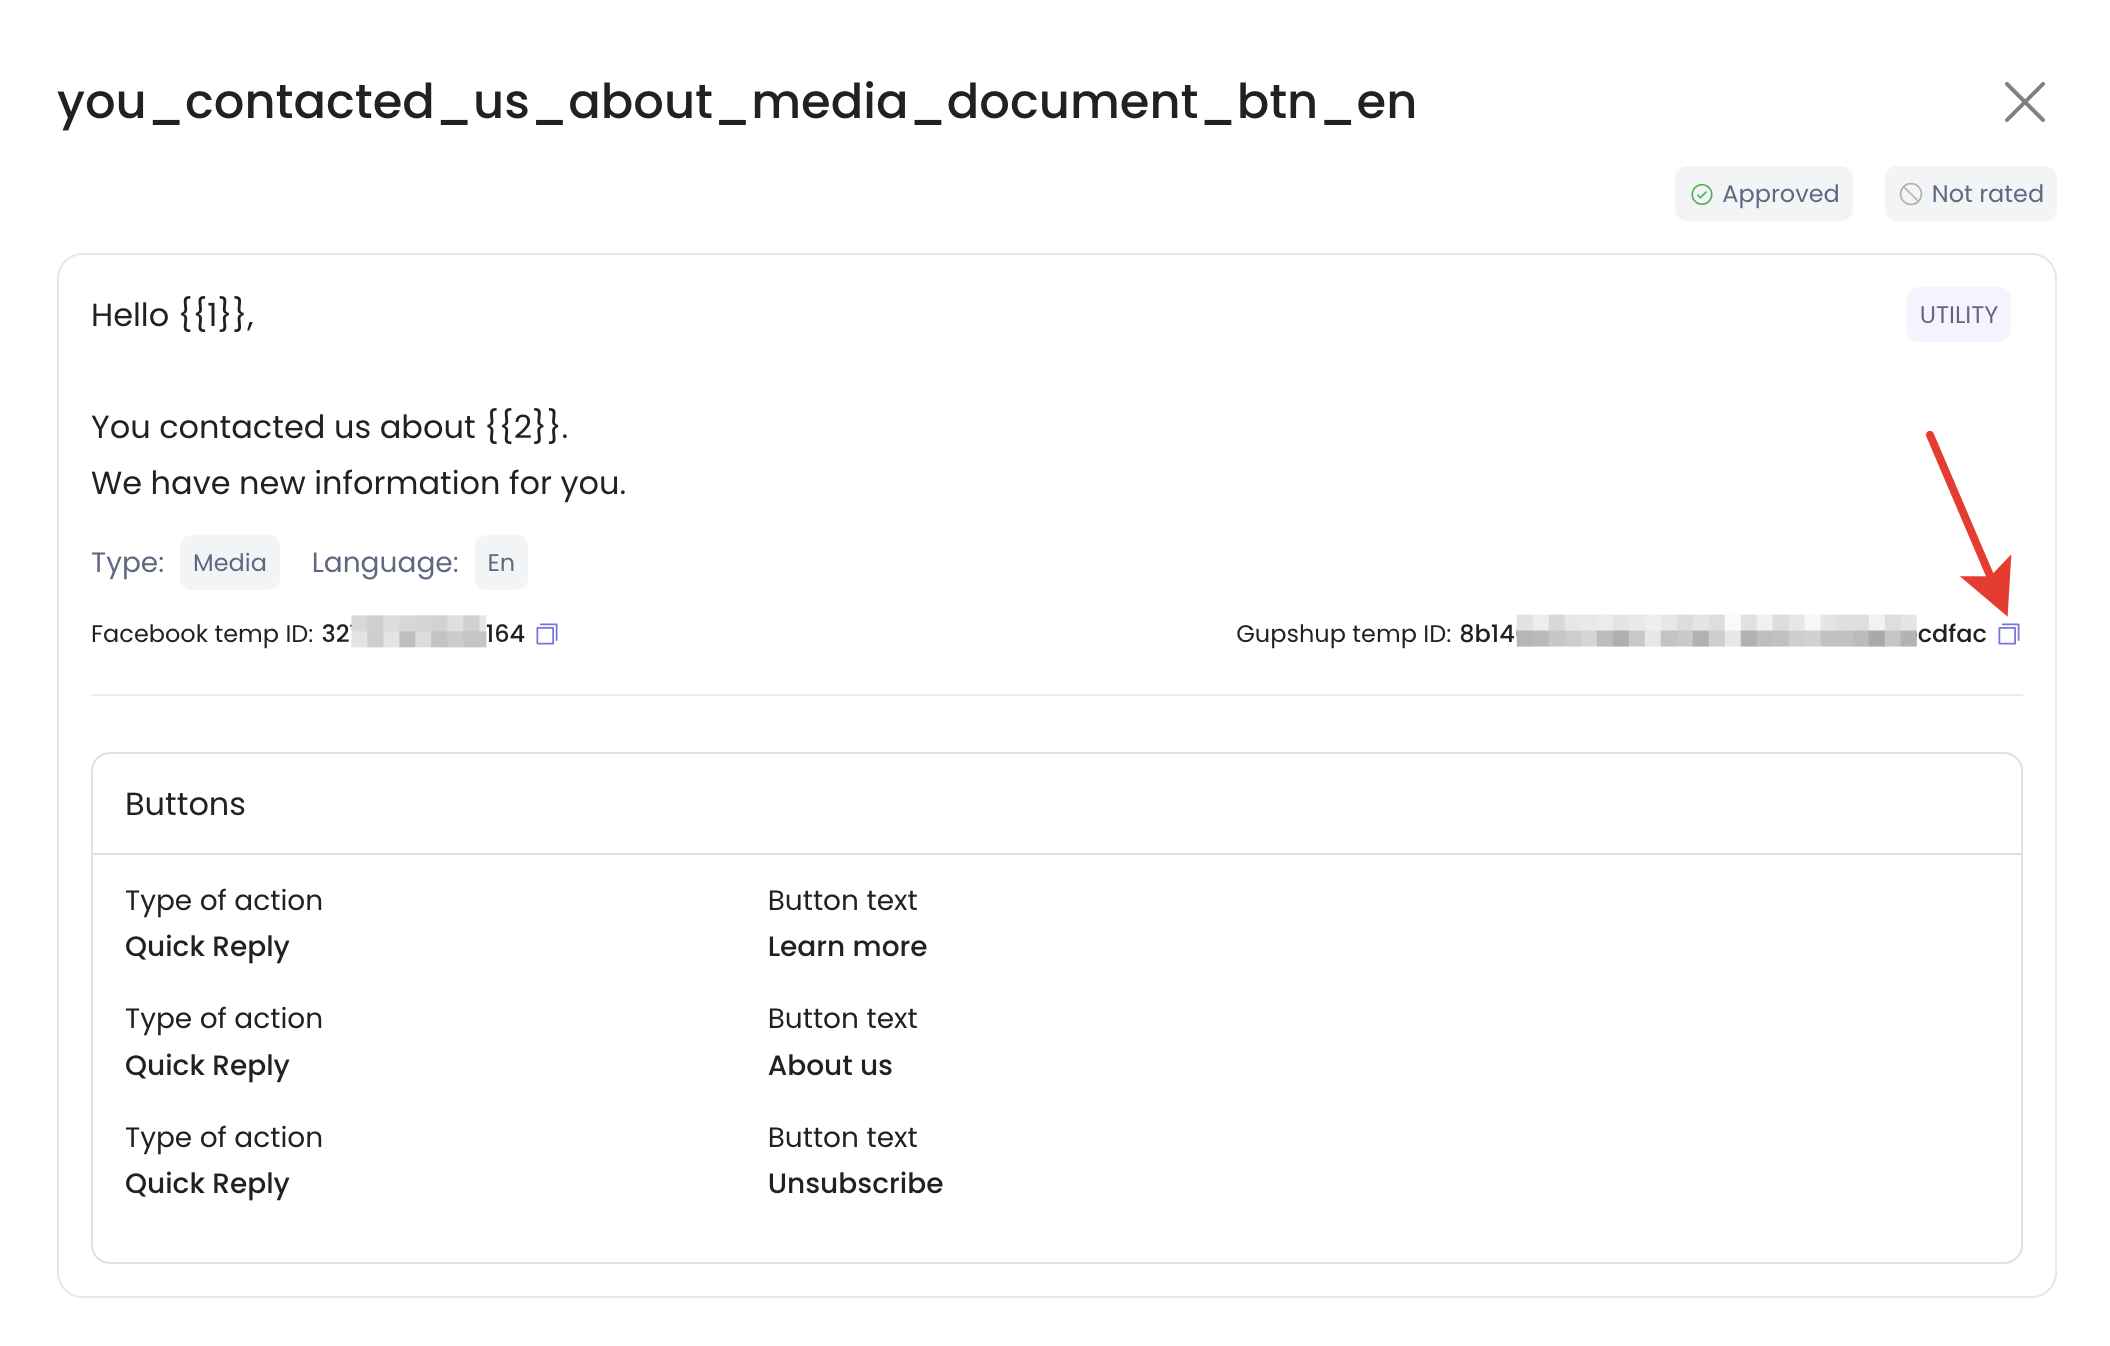
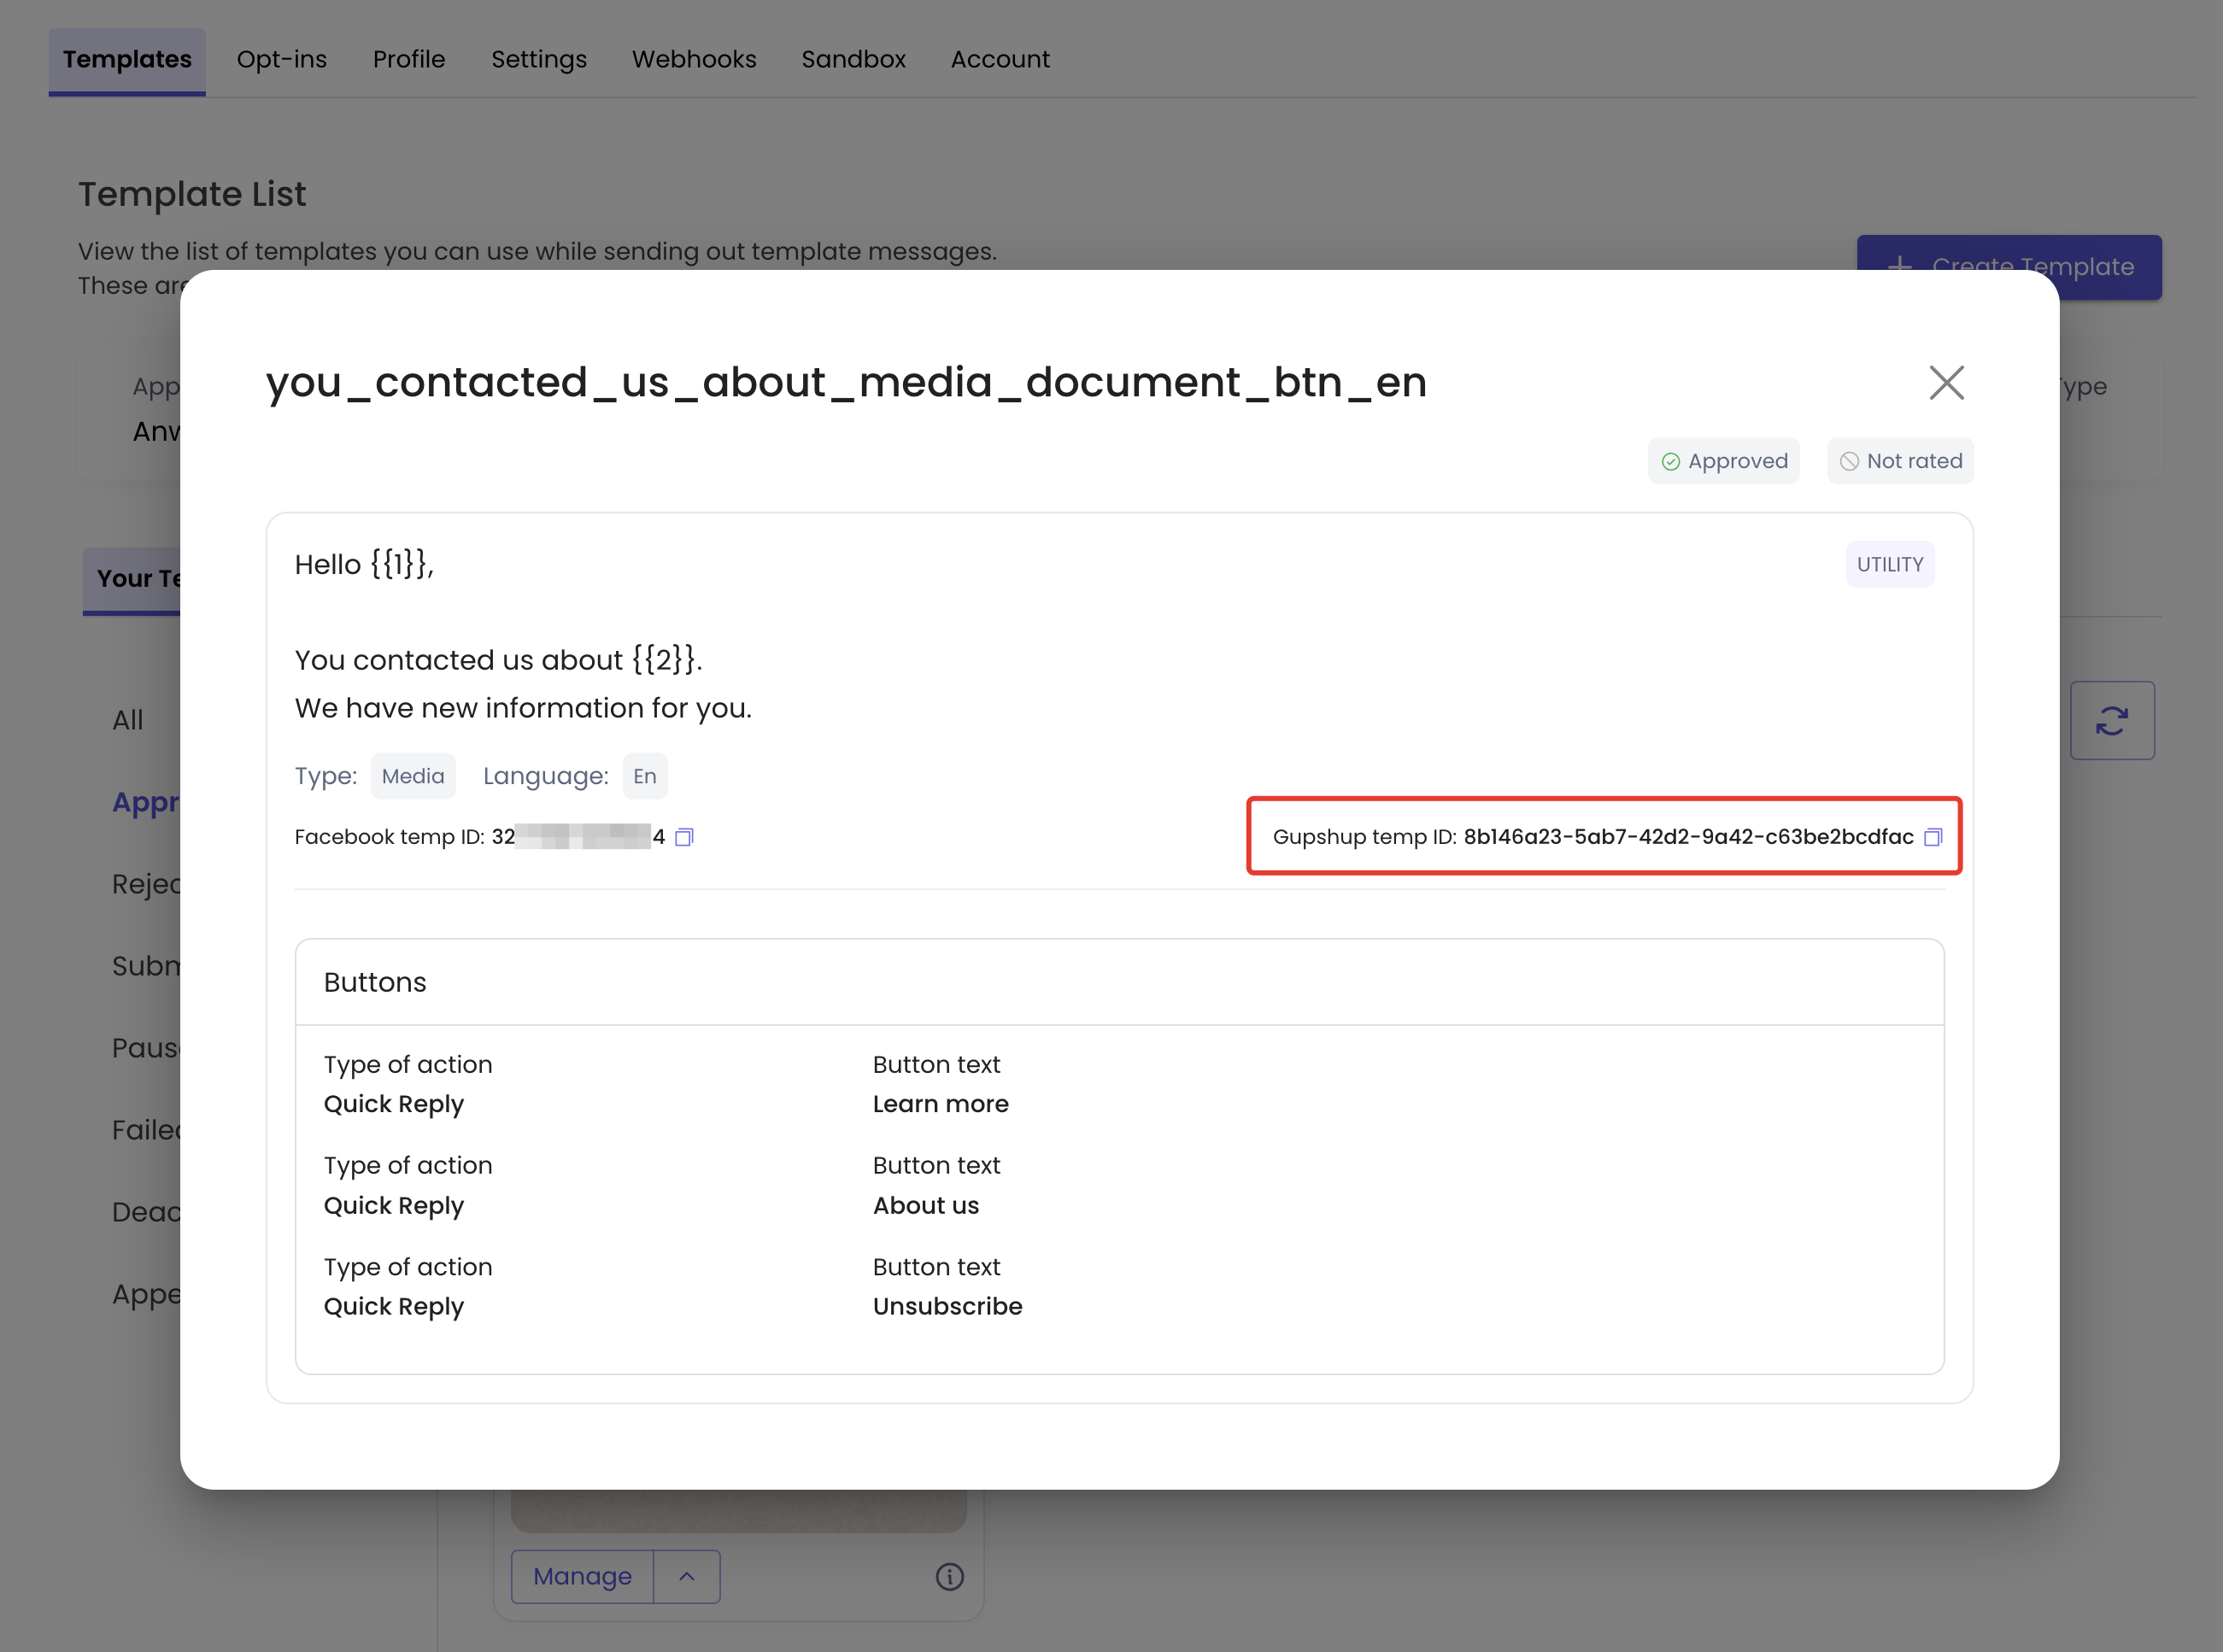
6. Copy the "Gupshup temp ID":
3. How to get a link to the Document
Upload the Document in PDF, DOCX or XLSX format to your website hosting service or any other file hosting service that allows you to provide a direct link to the hosted file. The link to the file should look something like this: http://any_domain.com/any_document.pdf
4. Example of sending a template message
1. Approved template:
2. Text to send:
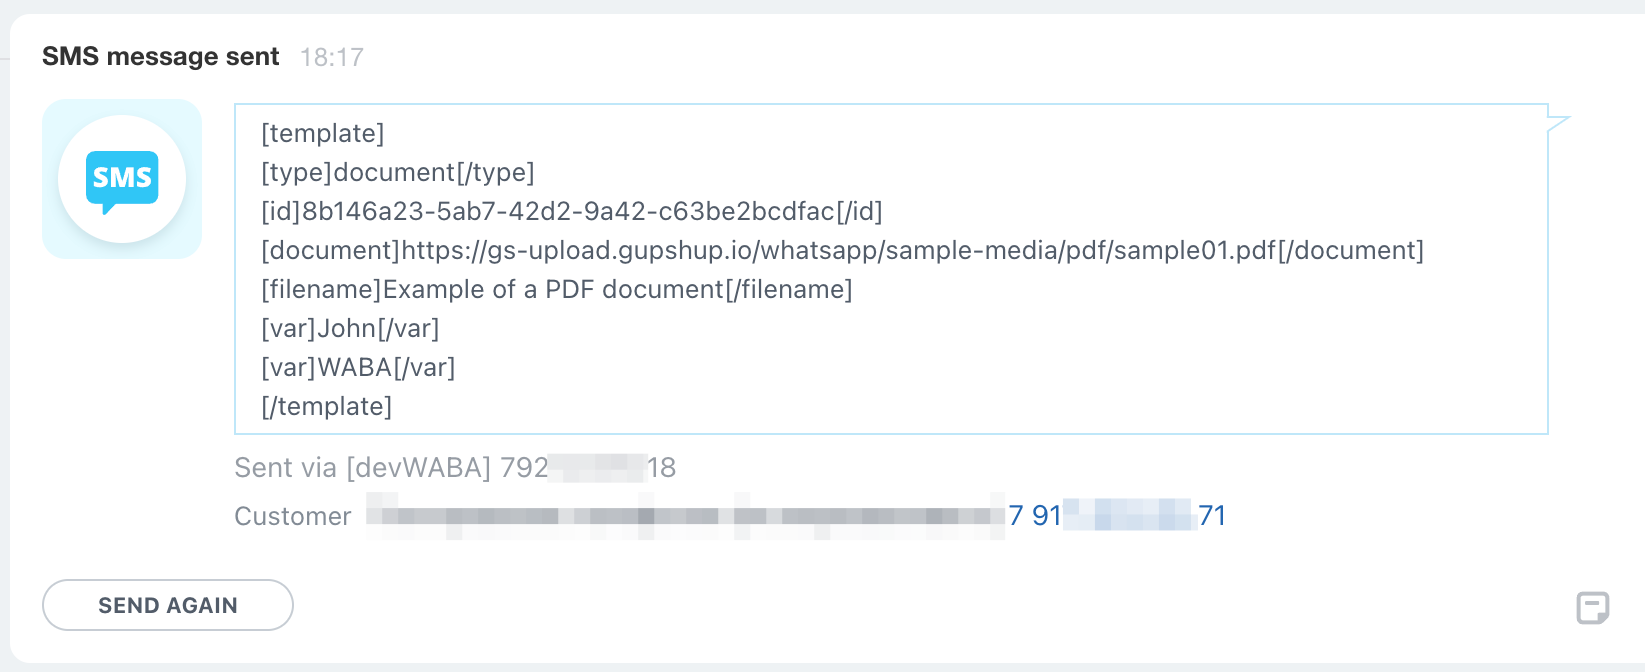
[template]
[type]document[/type]
[id]8b146a23-5ab7-42d2-9a42-c63be2bcdfac[/id]
[document]https://gs-upload.gupshup.io/whatsapp/sample-media/pdf/sample01.pdf[/document]
[filename]Example of a PDF document[/filename]
[var]John[/var]
[var]WABA[/var]
[/template]
3. Sending from Bitrix24:

4. The message the customer received:
