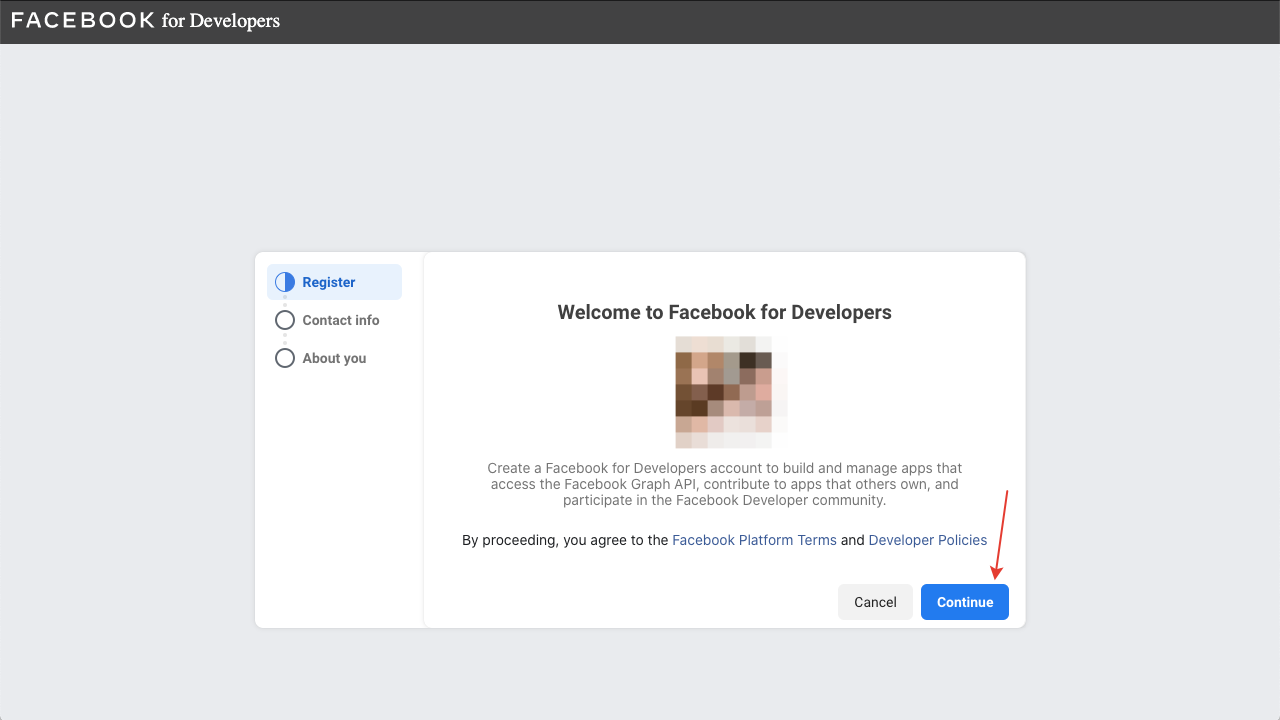
2. In the next window, click the "Continue" button.
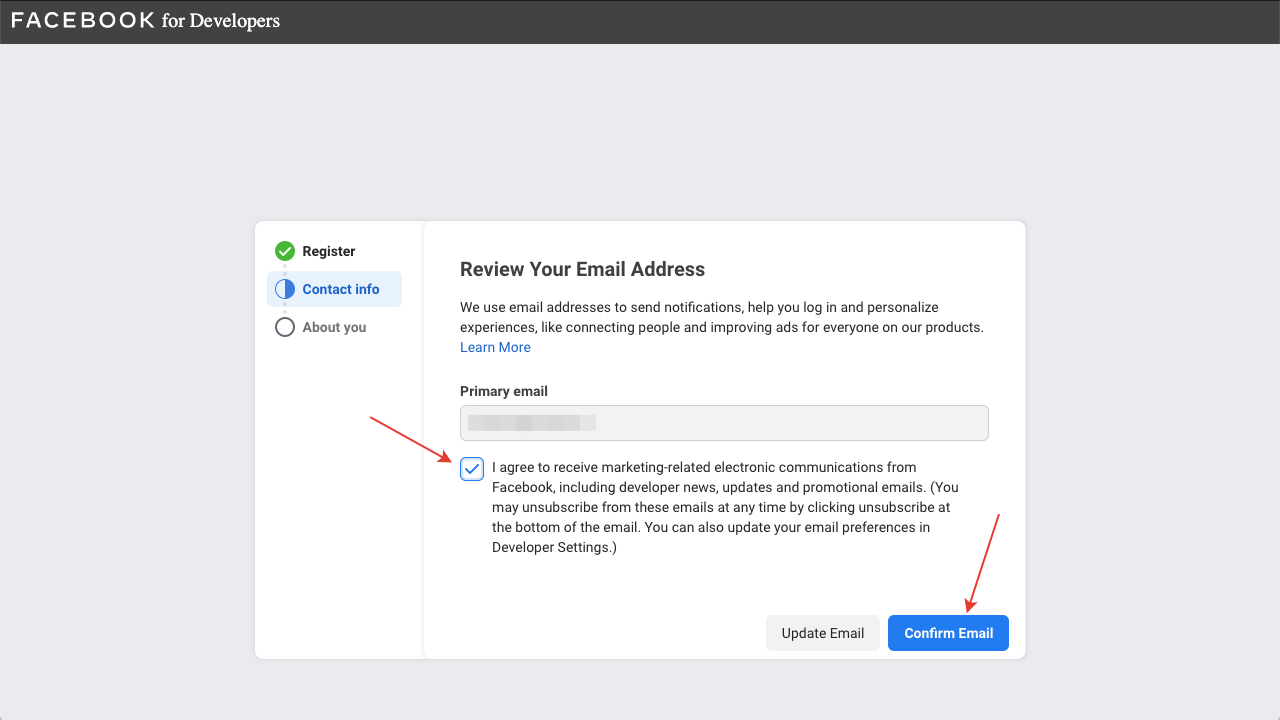
3. In the next window, check the box and click the "Confirm Email" button.
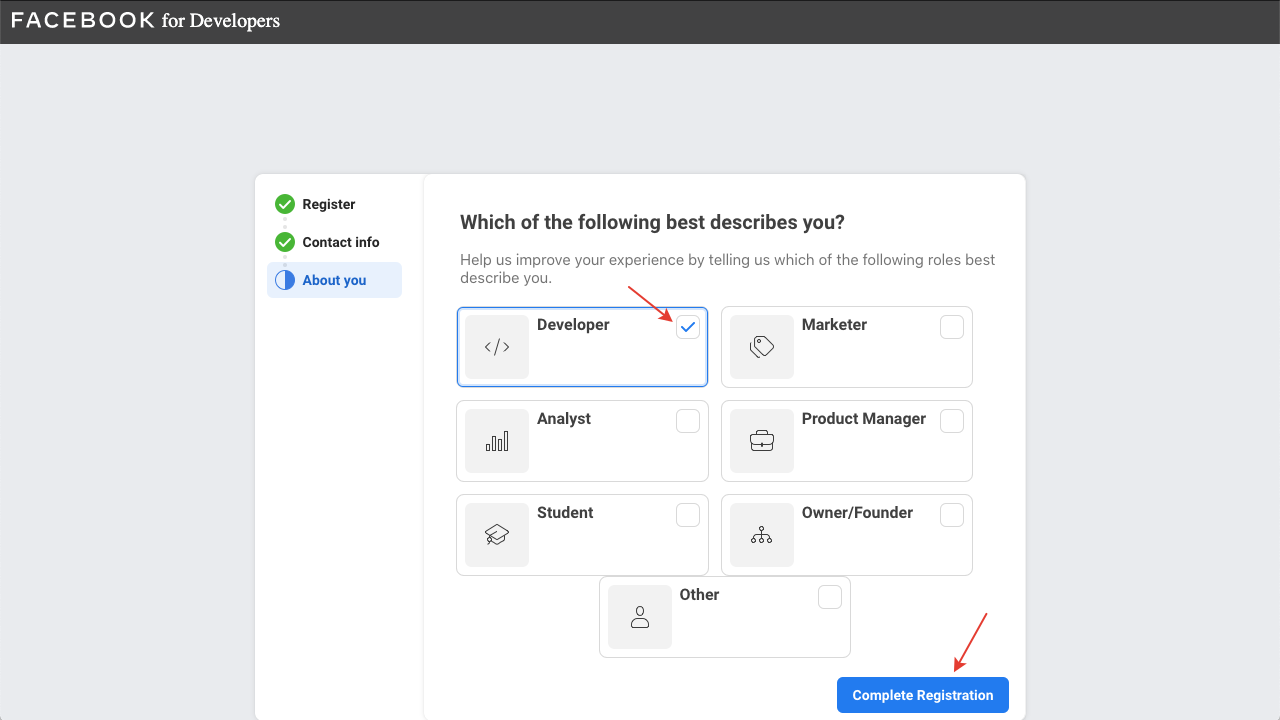
4. In the next window select "Developer" and click the "Complete Registration" button.
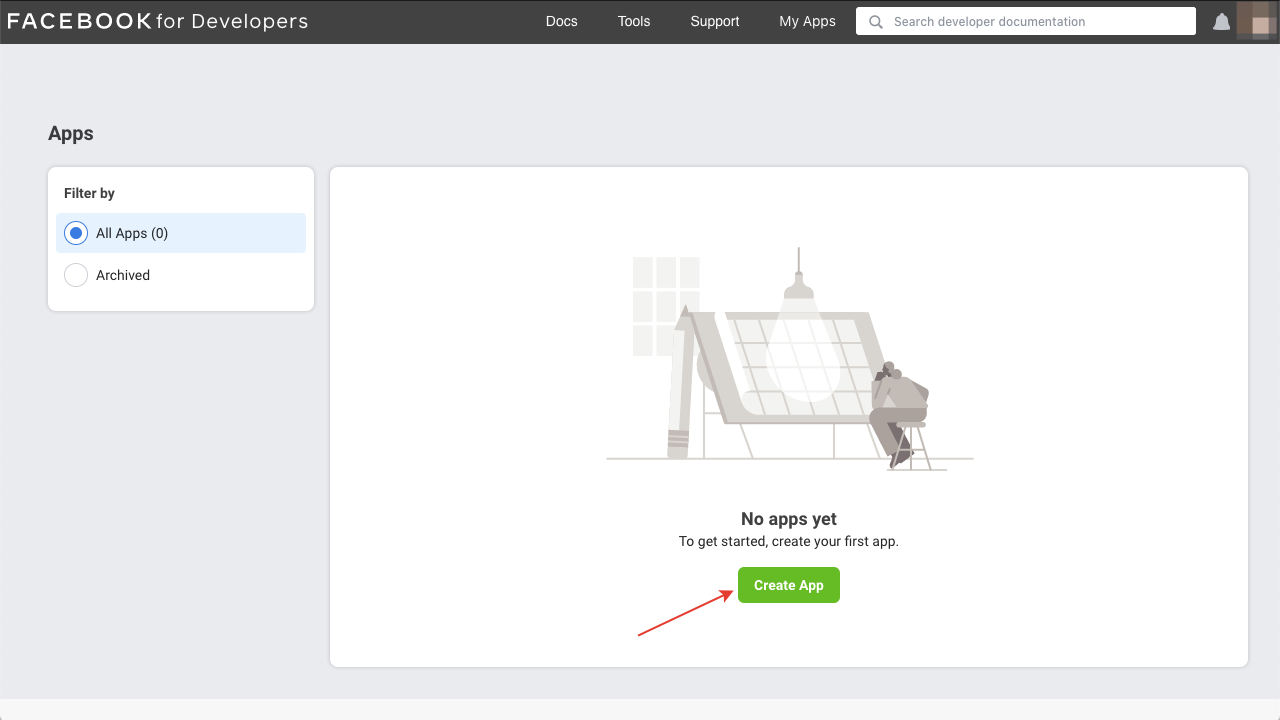
5. In the next window, click the "Create App" button.
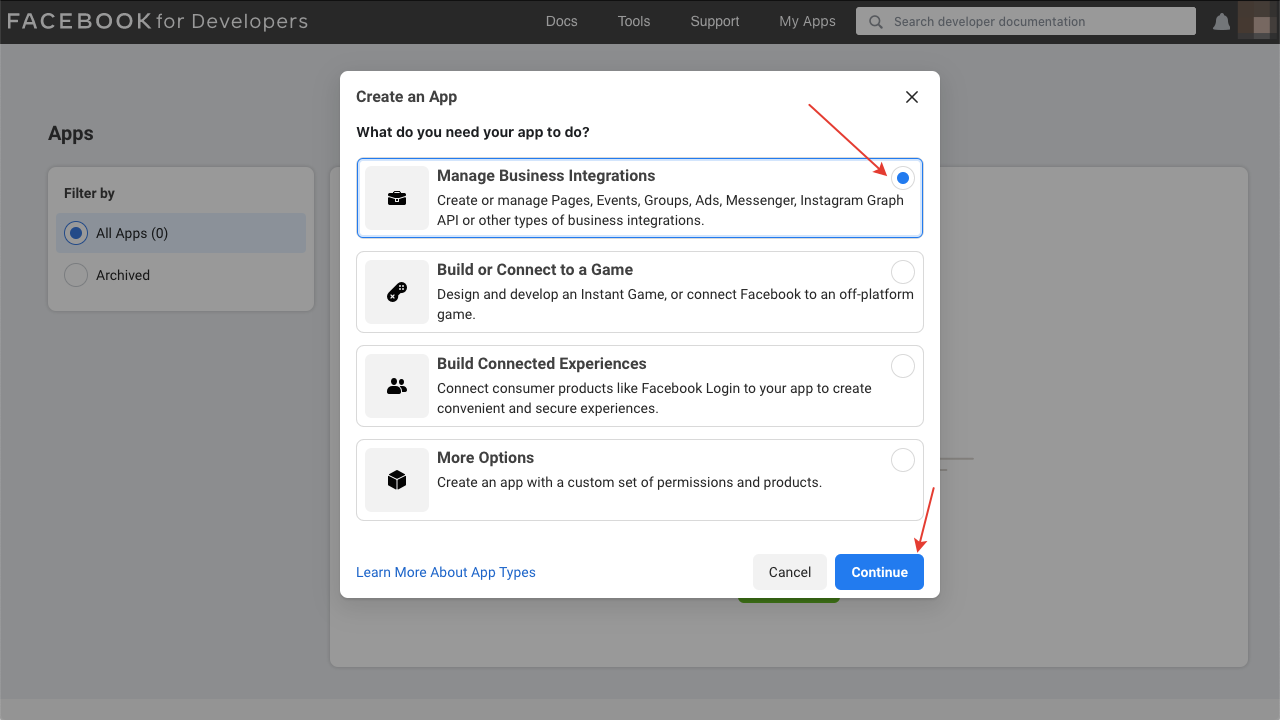
6. In the next window select "Manage Business Integrations" and click the "Continue" button.
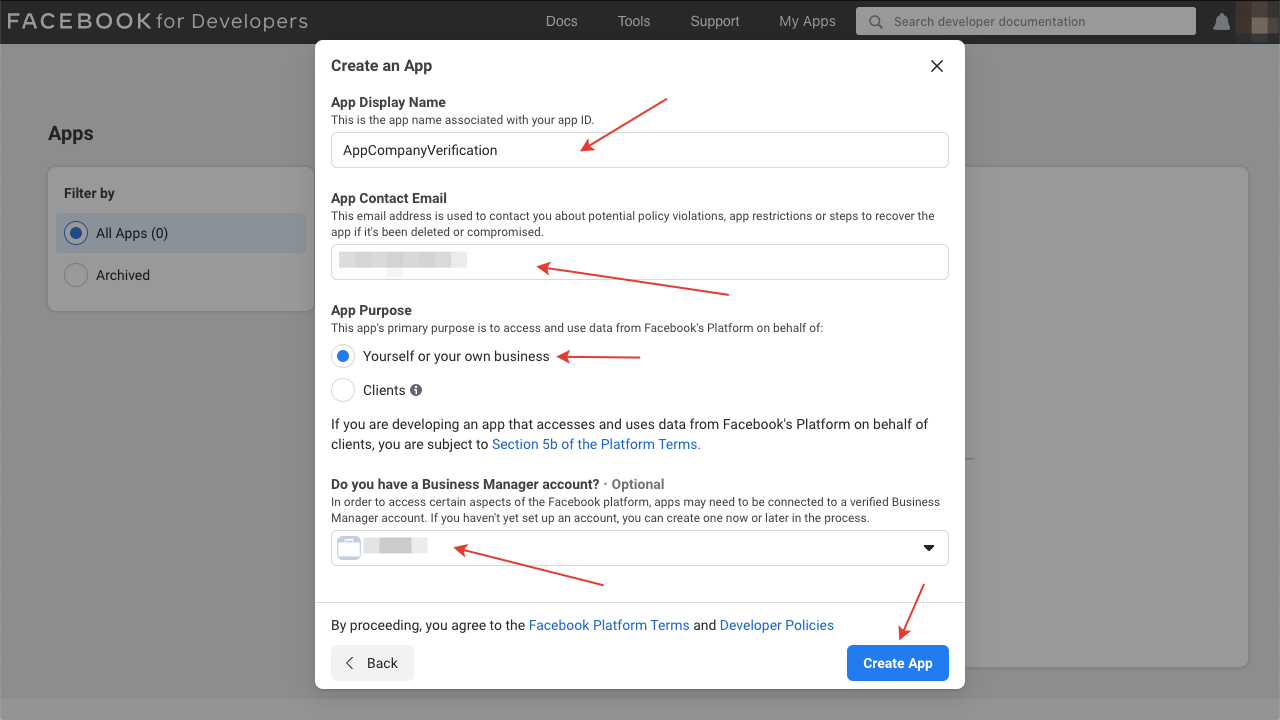
7. In the next window, enter any "App Display Name", select "App Purpose" - "Yourself or your own business", select your Business Manager account and click the "Create App" button.
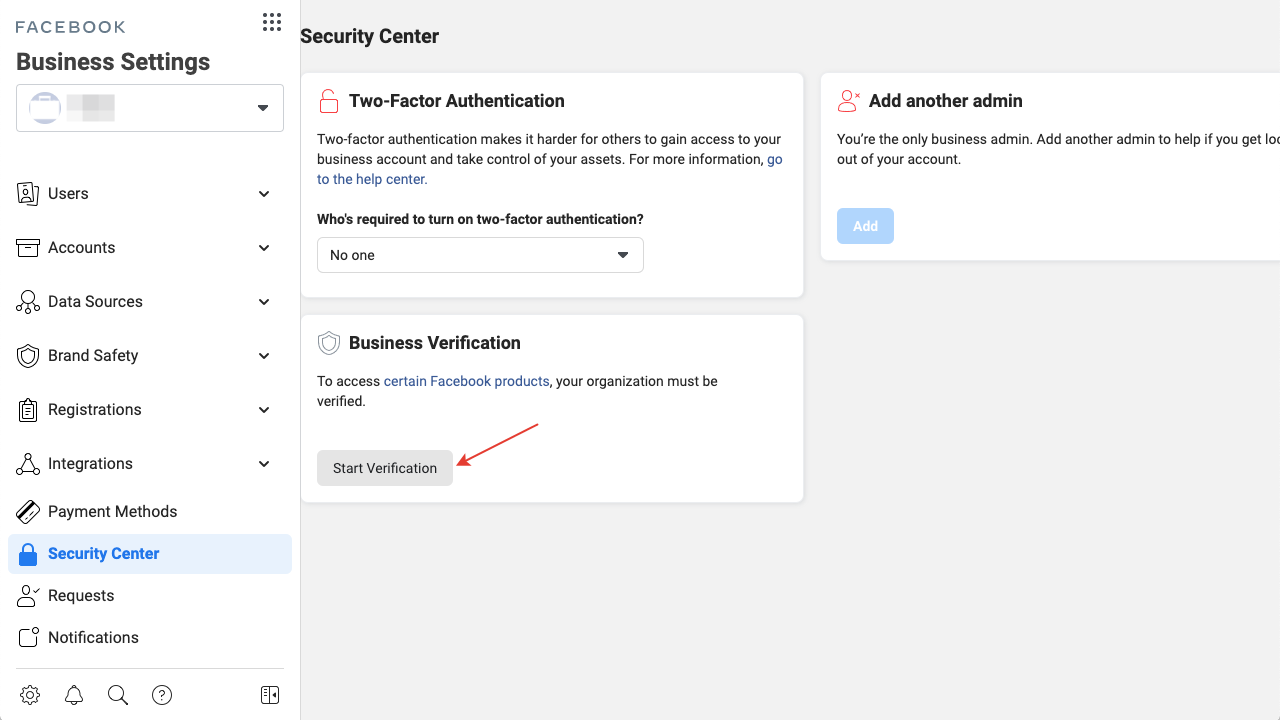
8. Go to https://business.facebook.com/settings/security, the "Start Verification" button has become active. Click it to start verification.