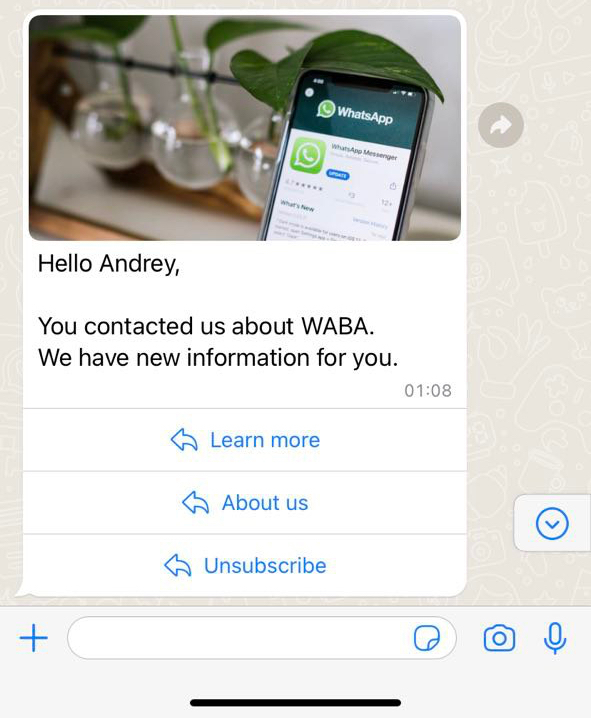
1. Prepare the following text for sending
[template]
[type]image[/type]
[id]Gupshup temp ID[/id]
[image]Image link[/image]
[var]Variable 1[/var]
[var]Variable 2[/var]
[var]Variable 3[/var]
[/template]
Inside the [id][/id] tag, insert your Gupshup temp ID.
Inside the [image][/image] tag, insert a link to the image. Below we will write how to upload an image to Bitrix24 and get a link to the image.
Use the [var][/var] tags to designate as many variables as are created in your template.
Inside the [image][/image] tag, insert a link to the image. Below we will write how to upload an image to Bitrix24 and get a link to the image.
Use the [var][/var] tags to designate as many variables as are created in your template.
2. How to get Gupshup temp ID
1. Open the Gupshup dashboard: https://www.gupshup.io/whatsapp/dashboard
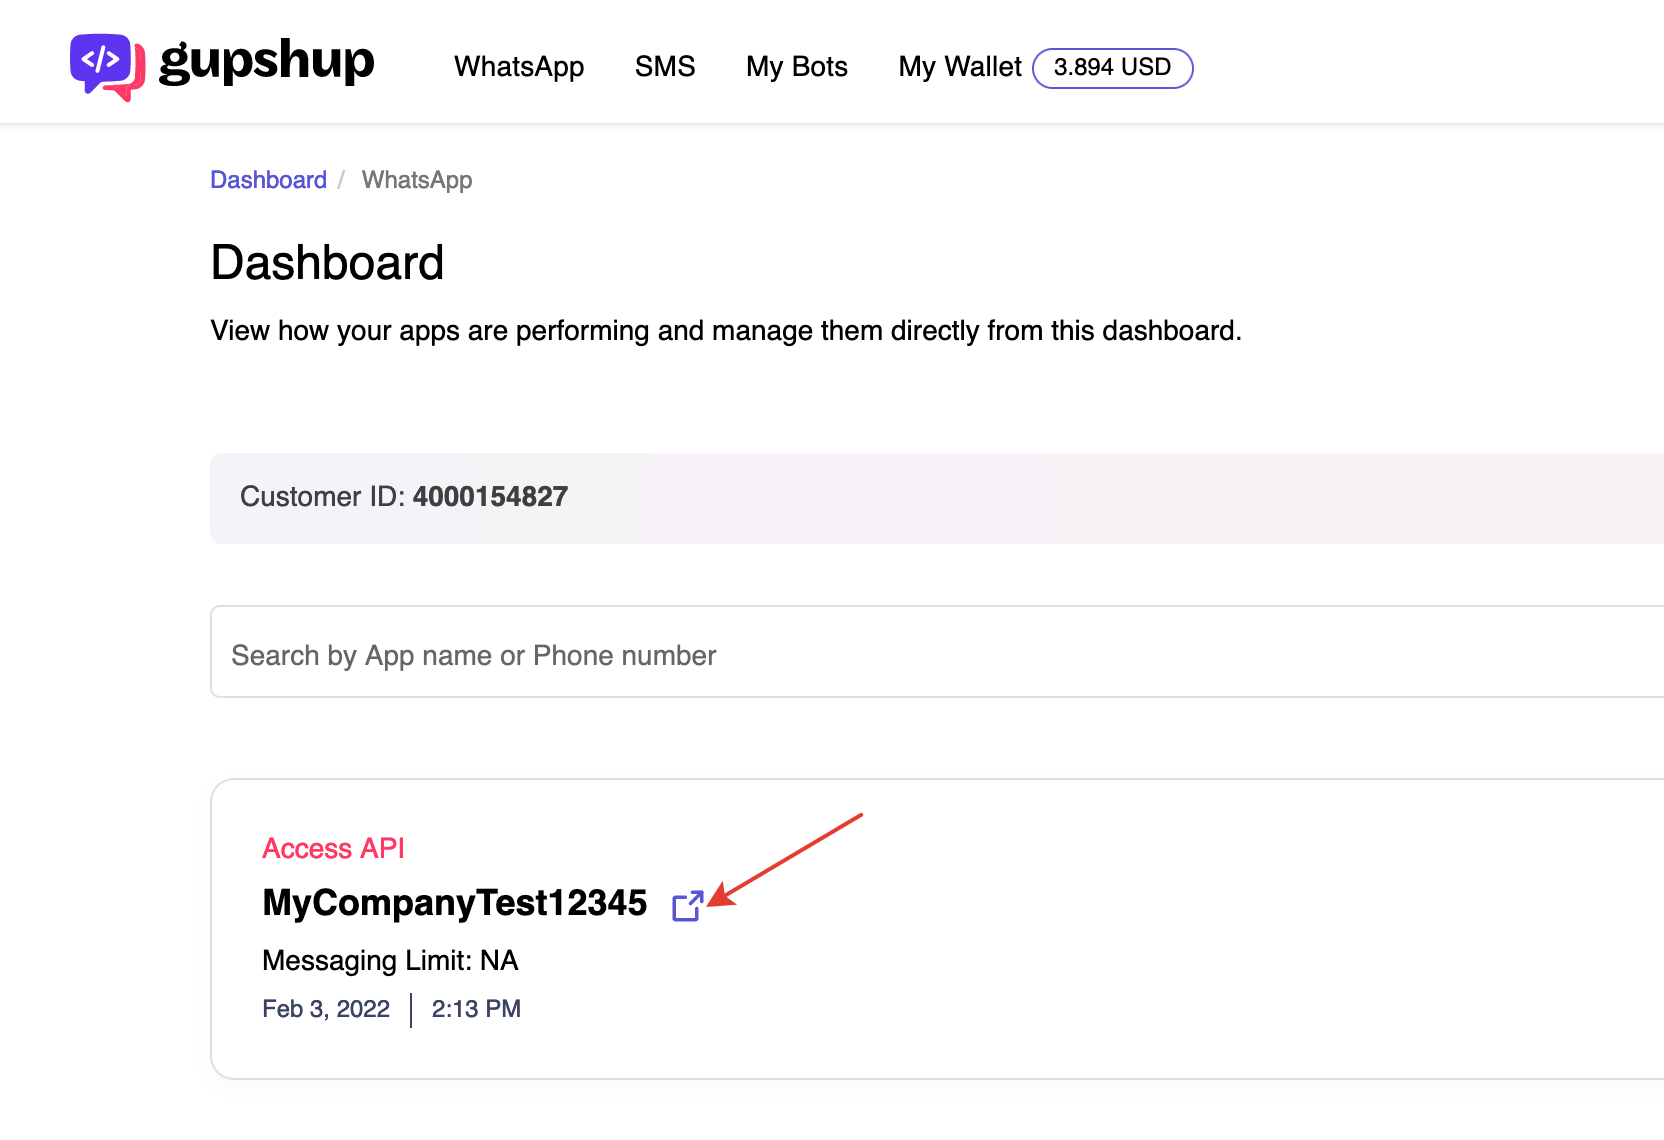
2. Click on the name of your Gupshup App to go to settings:
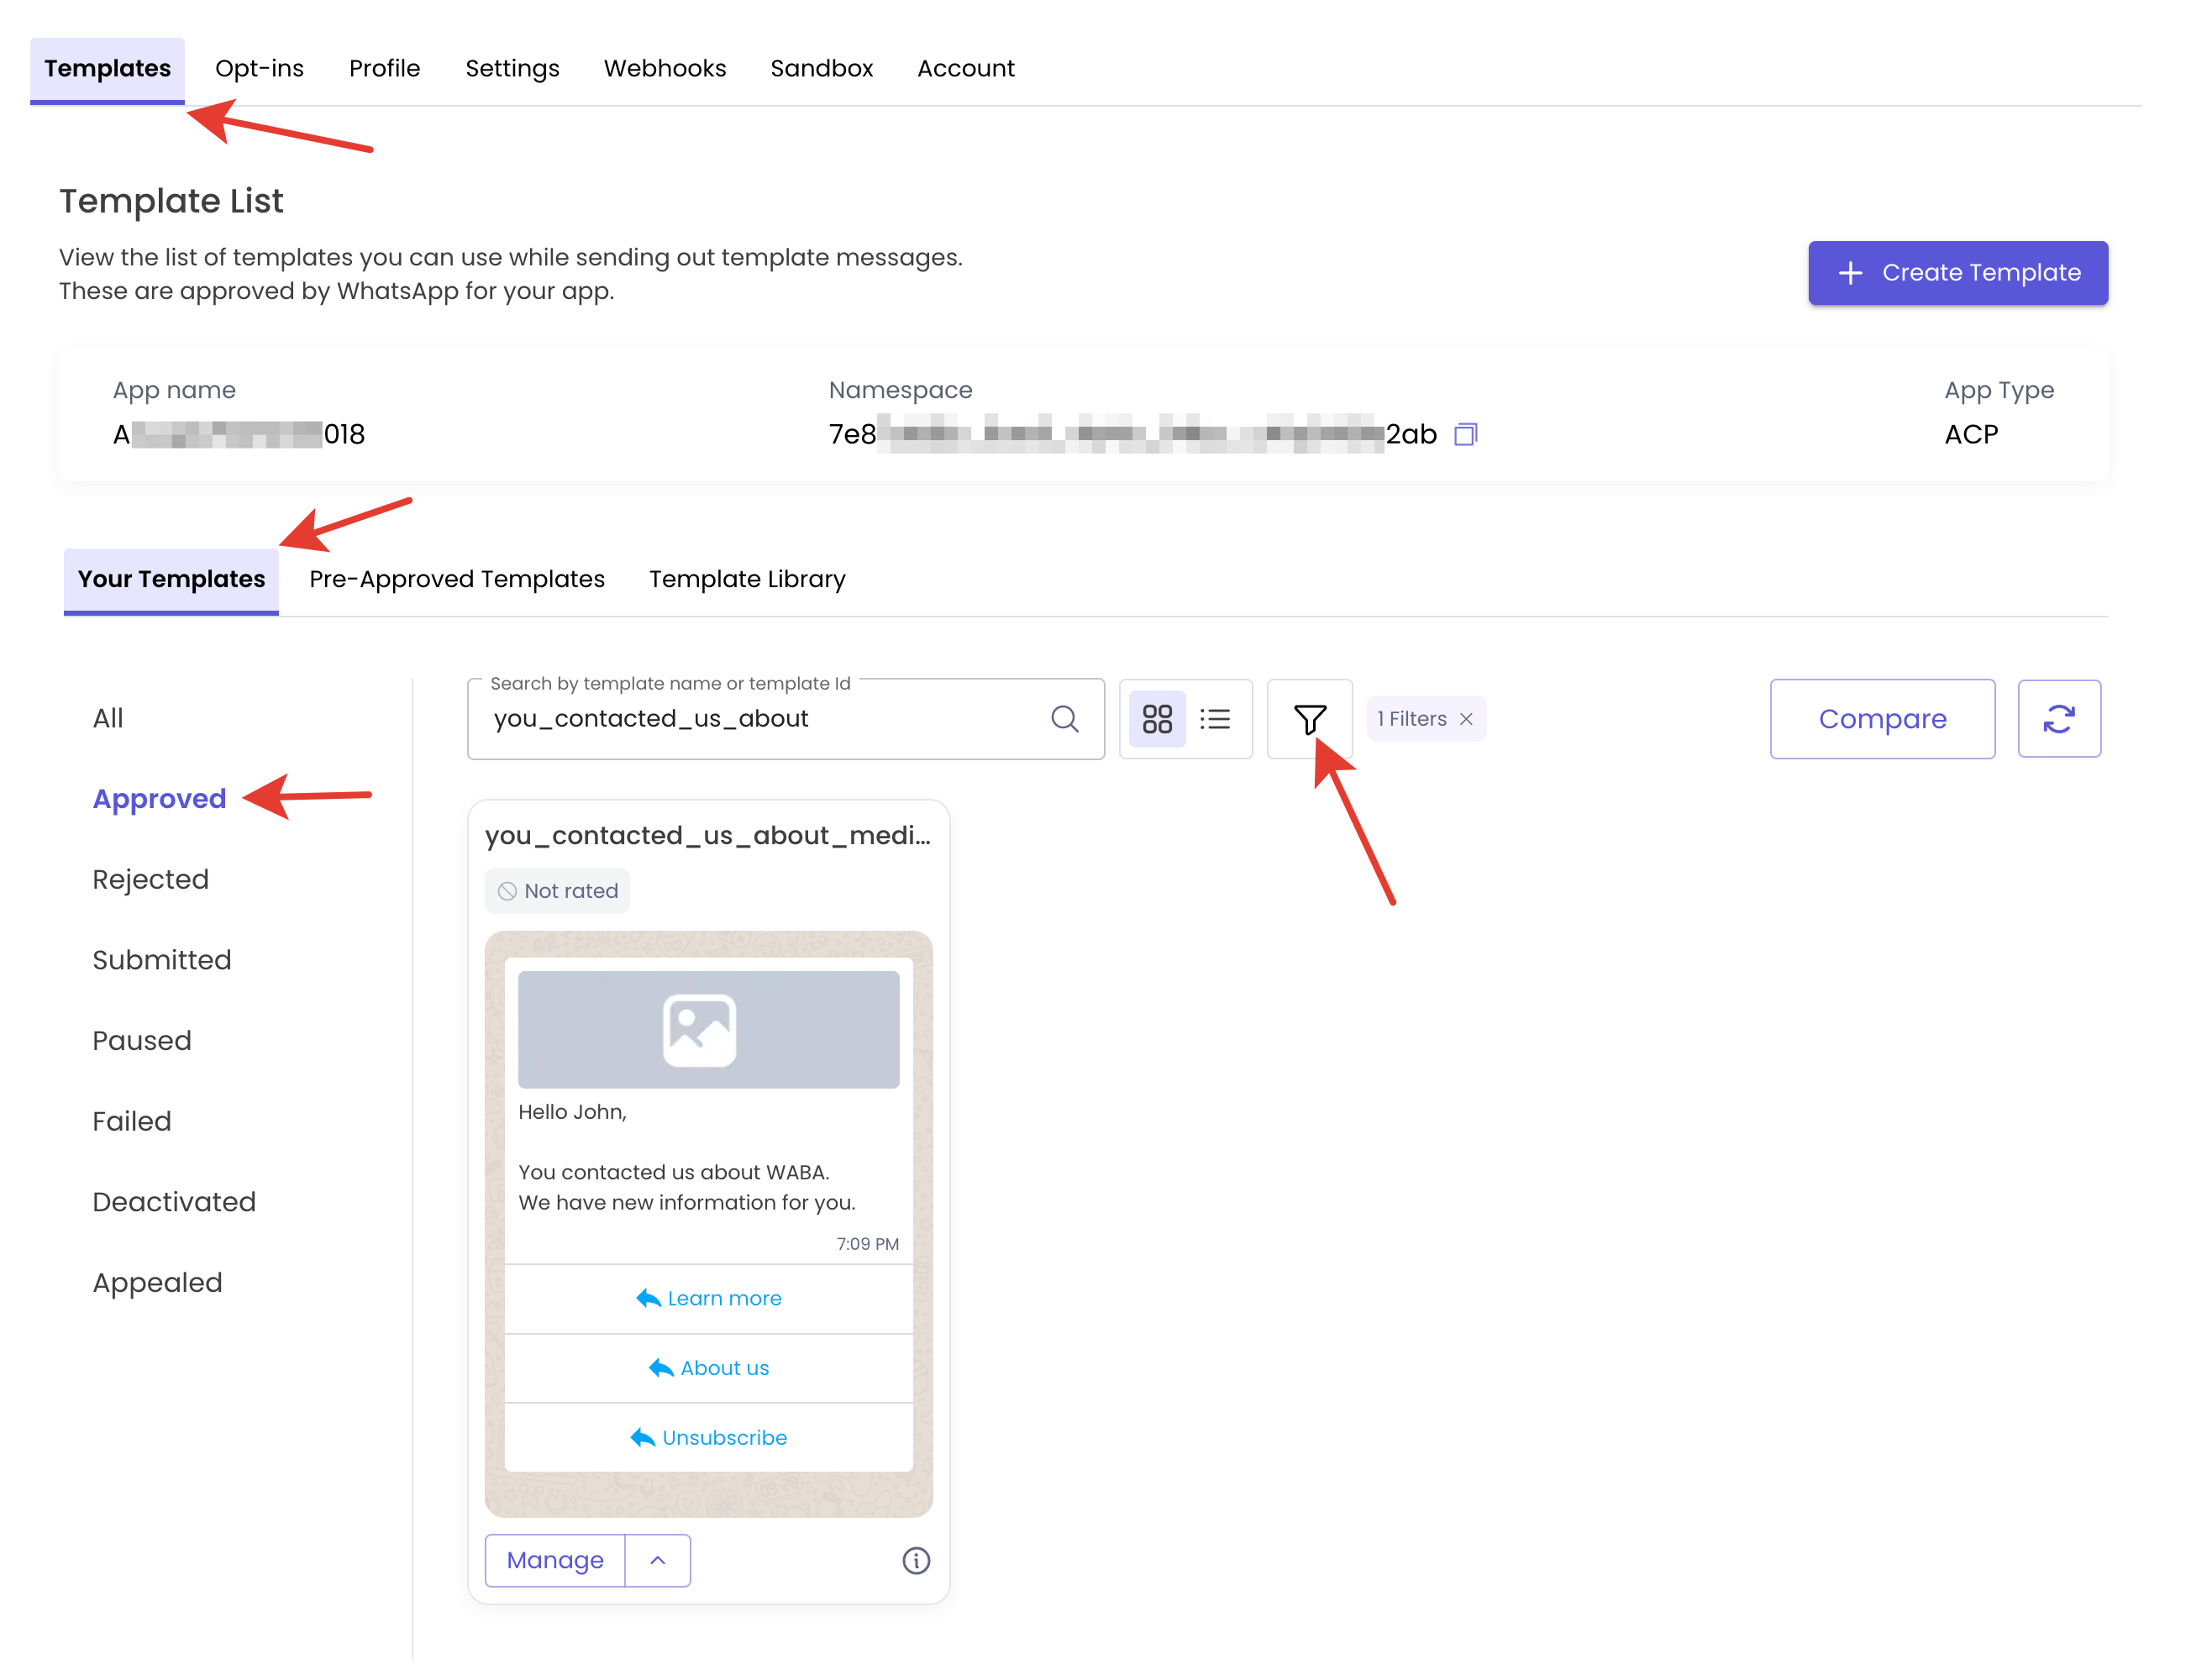
3. Open the list of your approved templates and click on the filter icon:
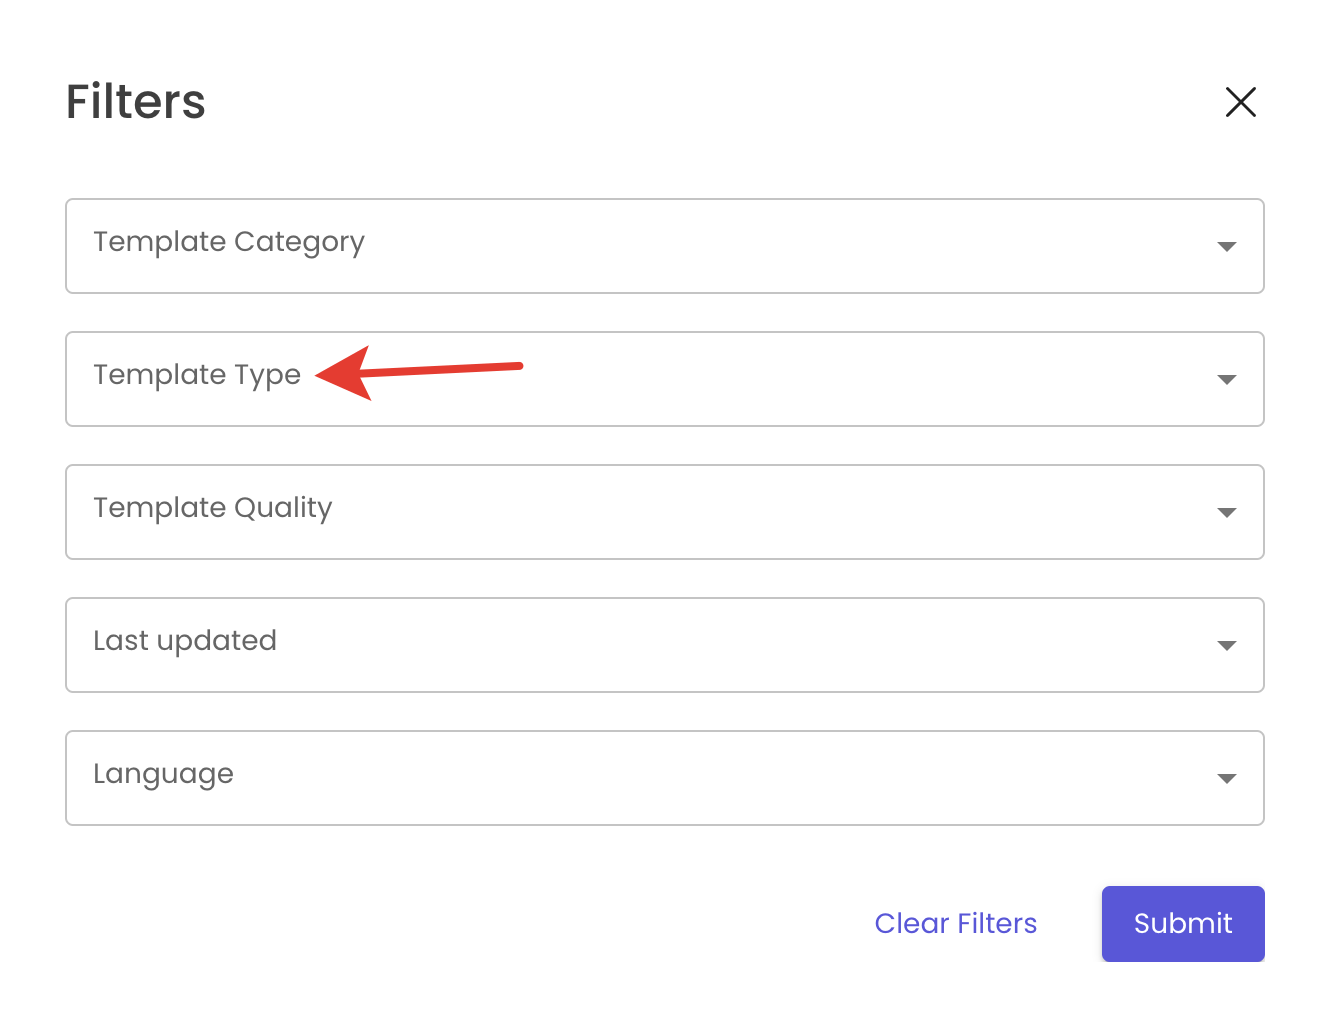
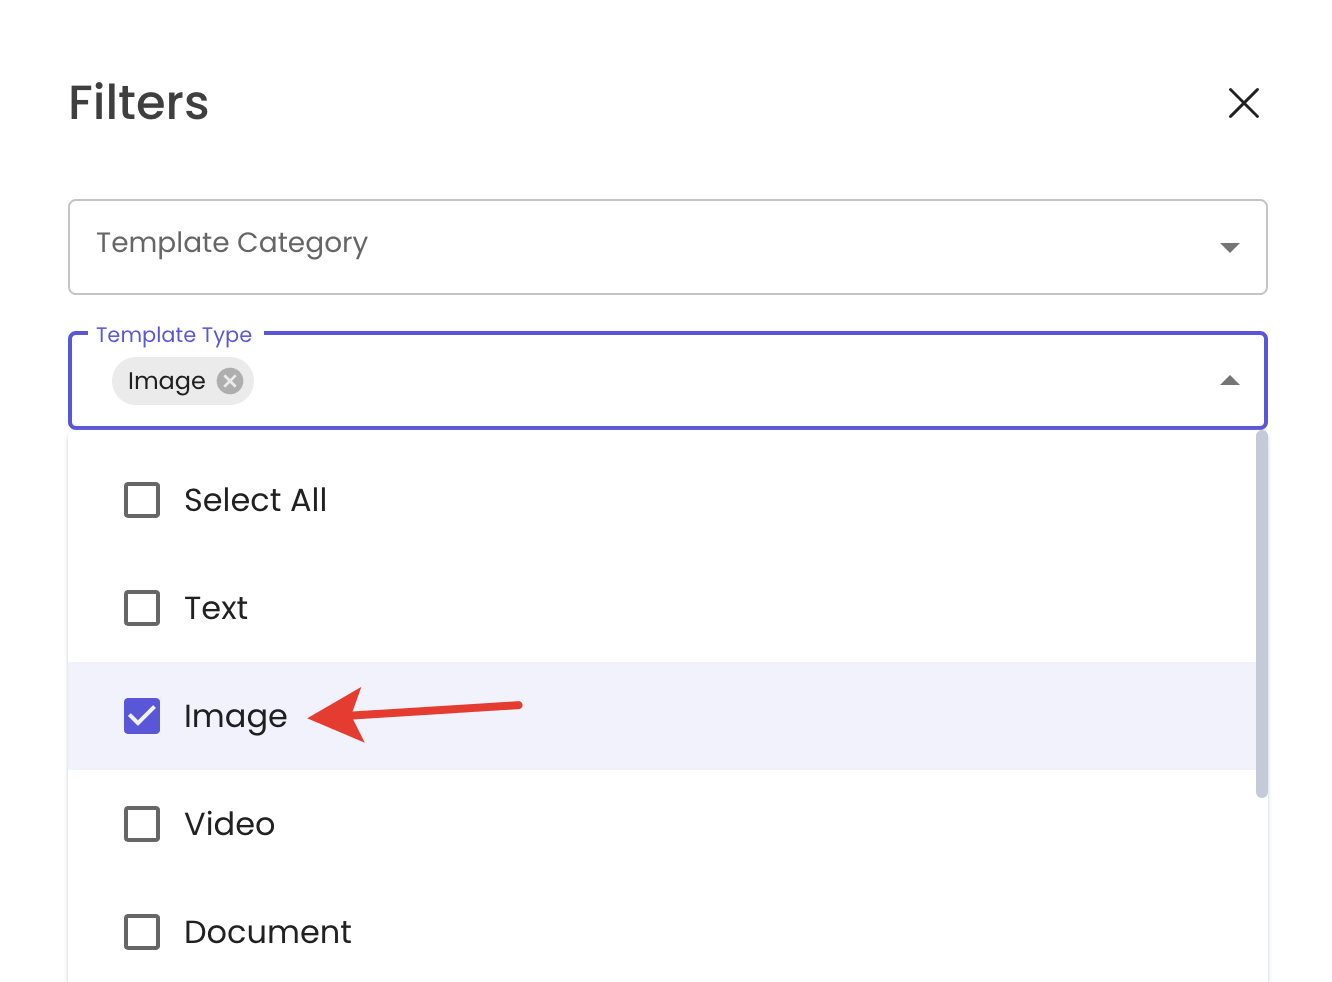
4. Set in the Filter Template Type: Image
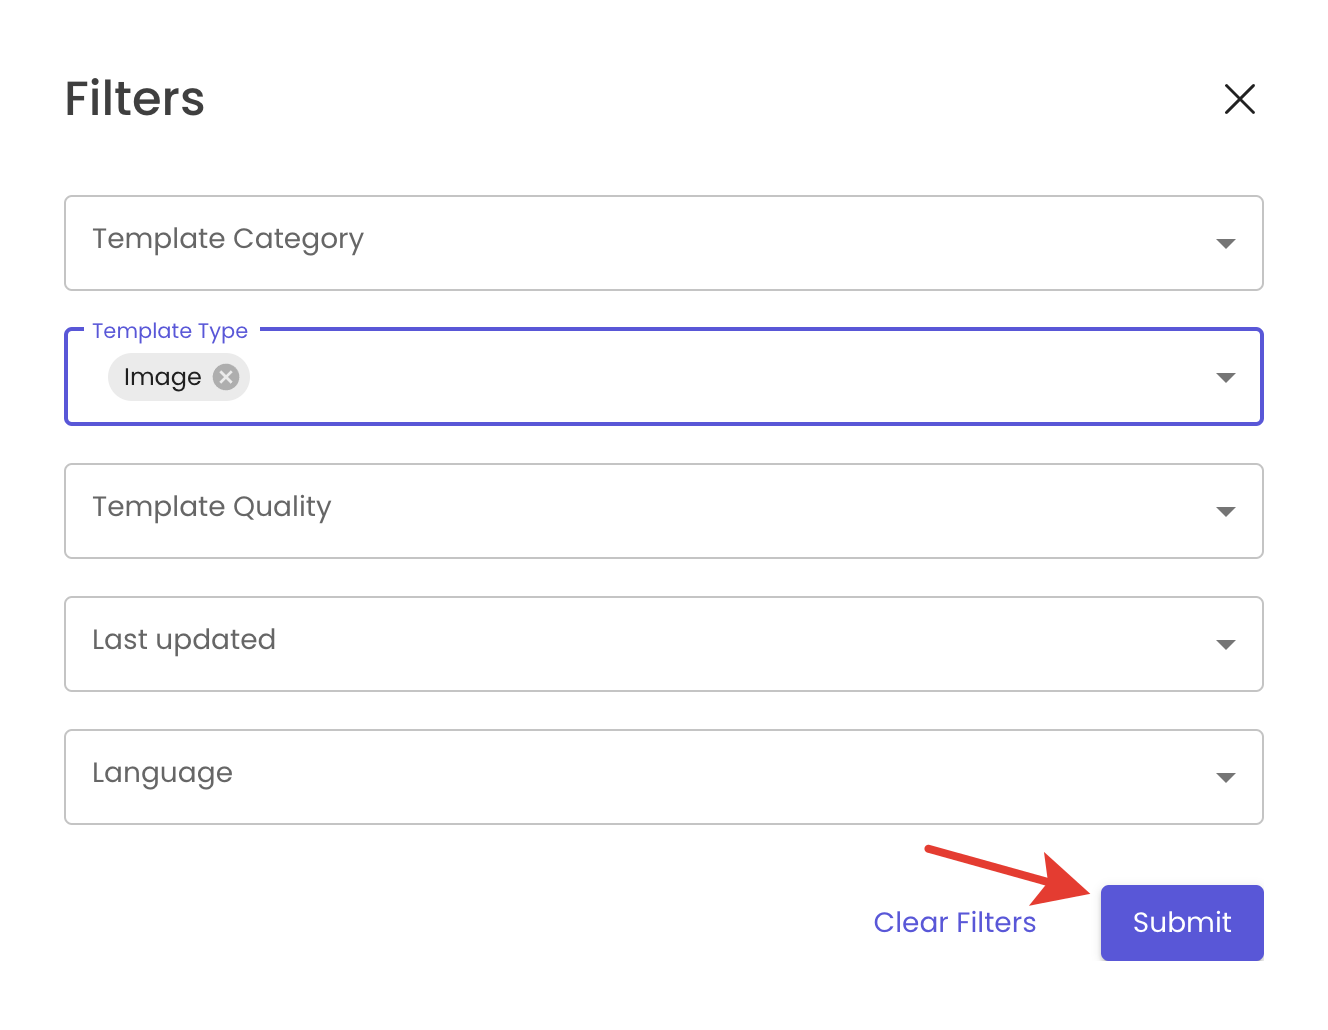
5. Click on the "i" icon:
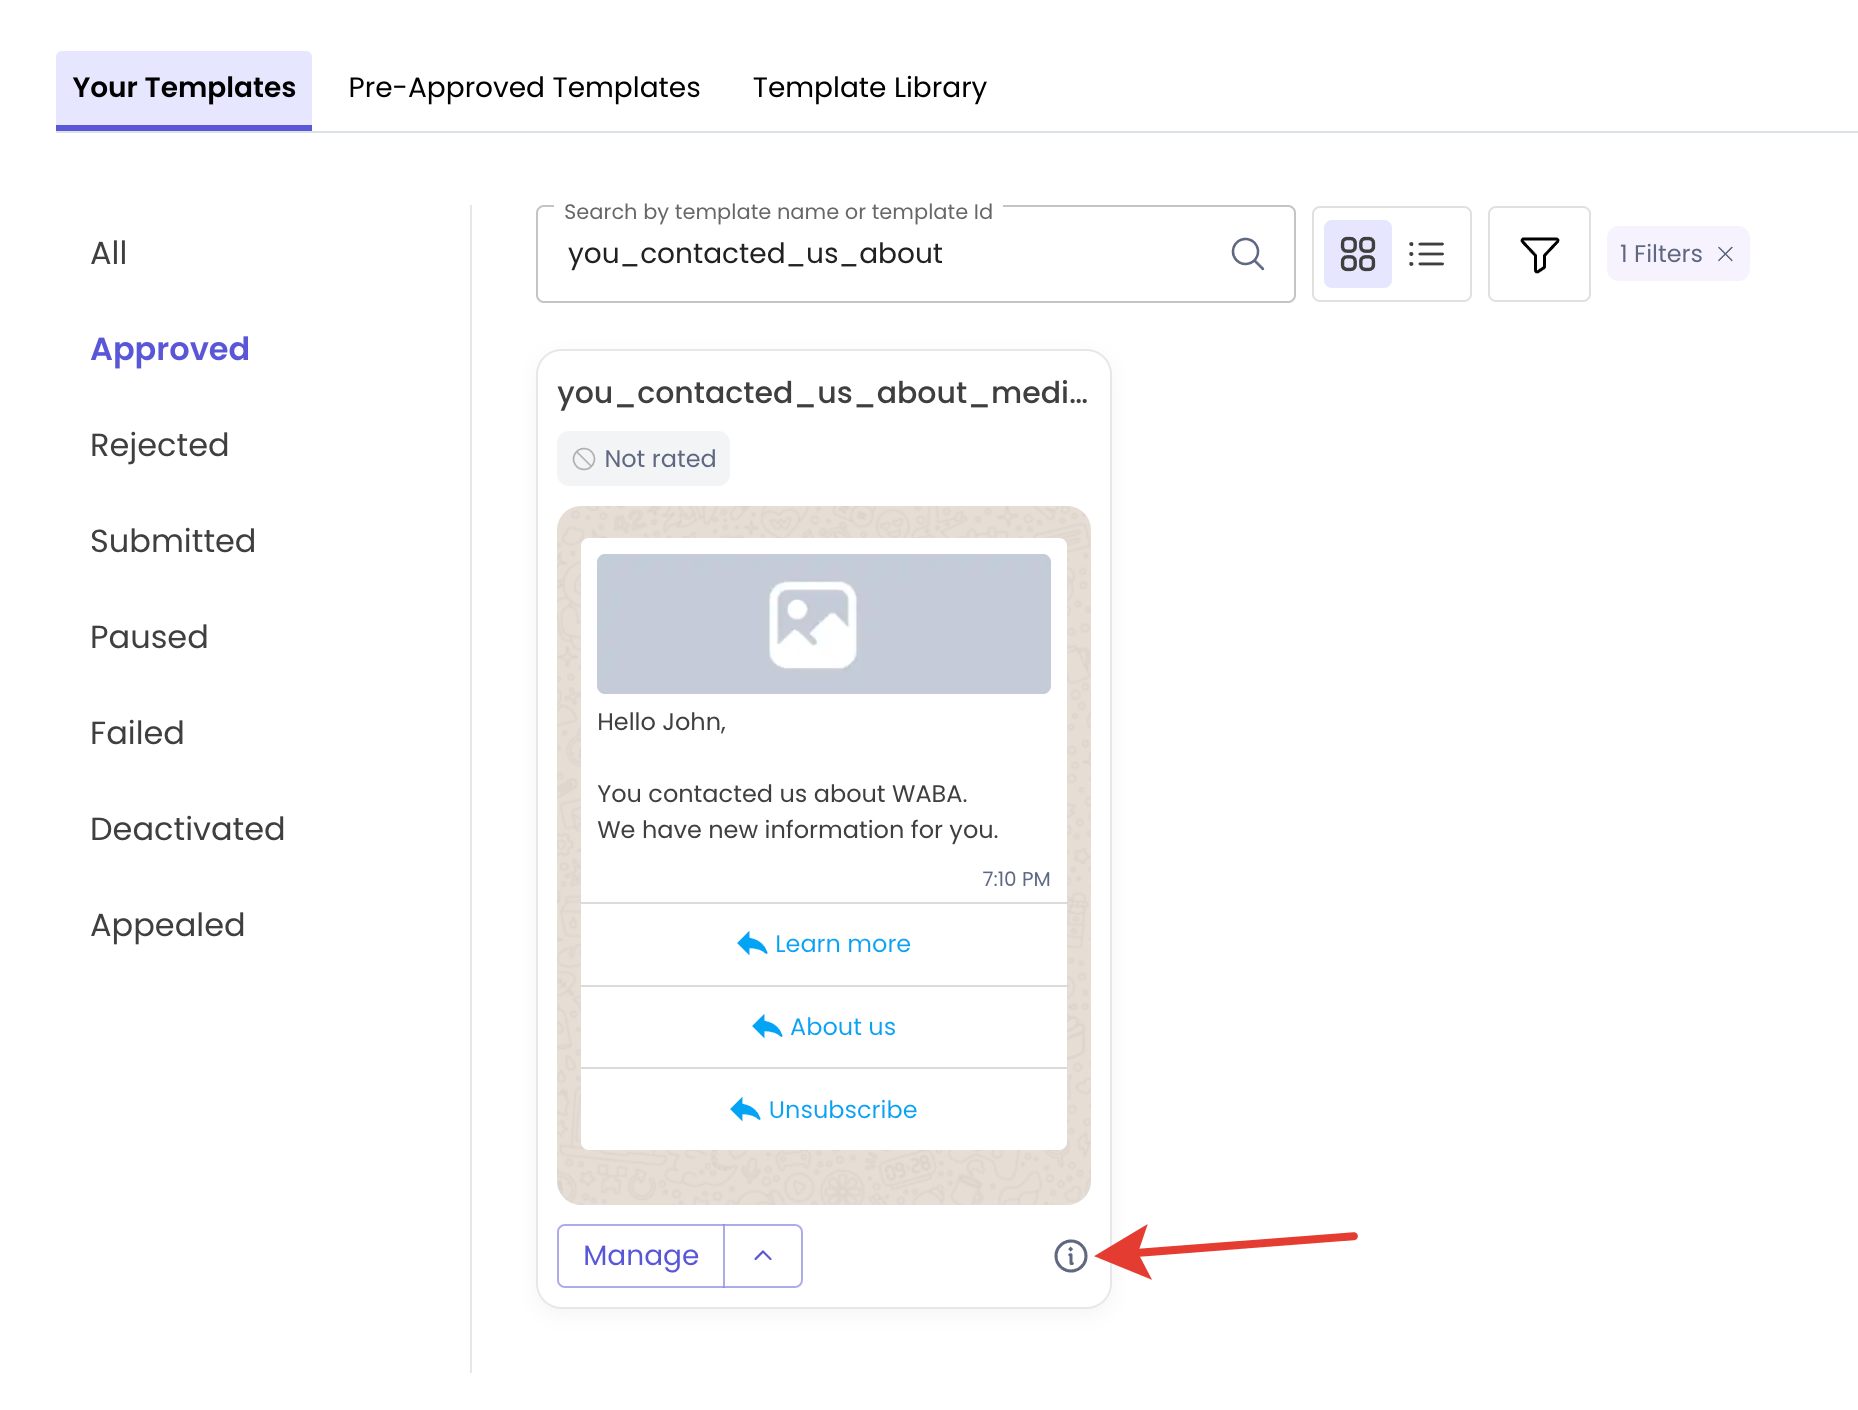
6. Copy the "Gupshup temp ID":

3. How to get an image link
1. Upload the image to your Bitrix24 Drive:
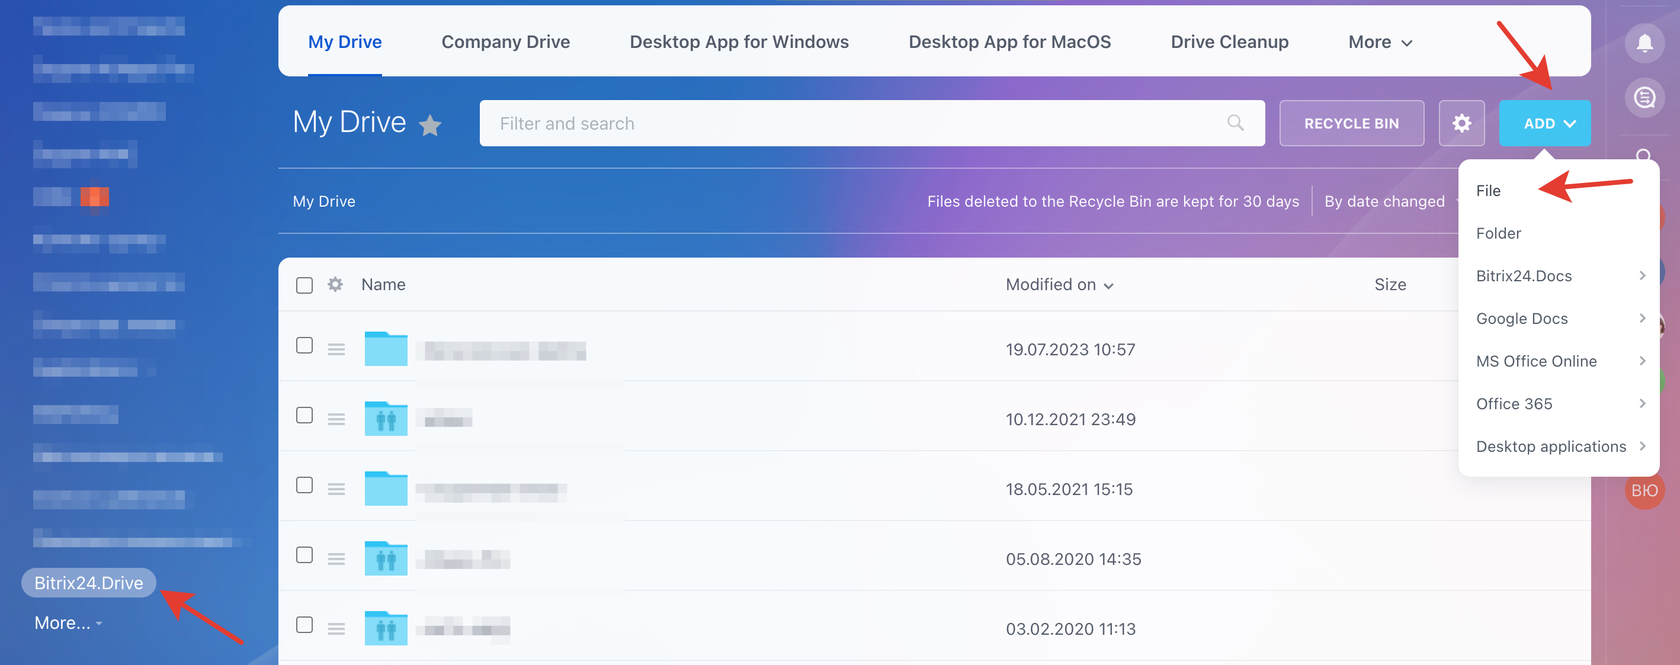
2. Get a public link to this file:
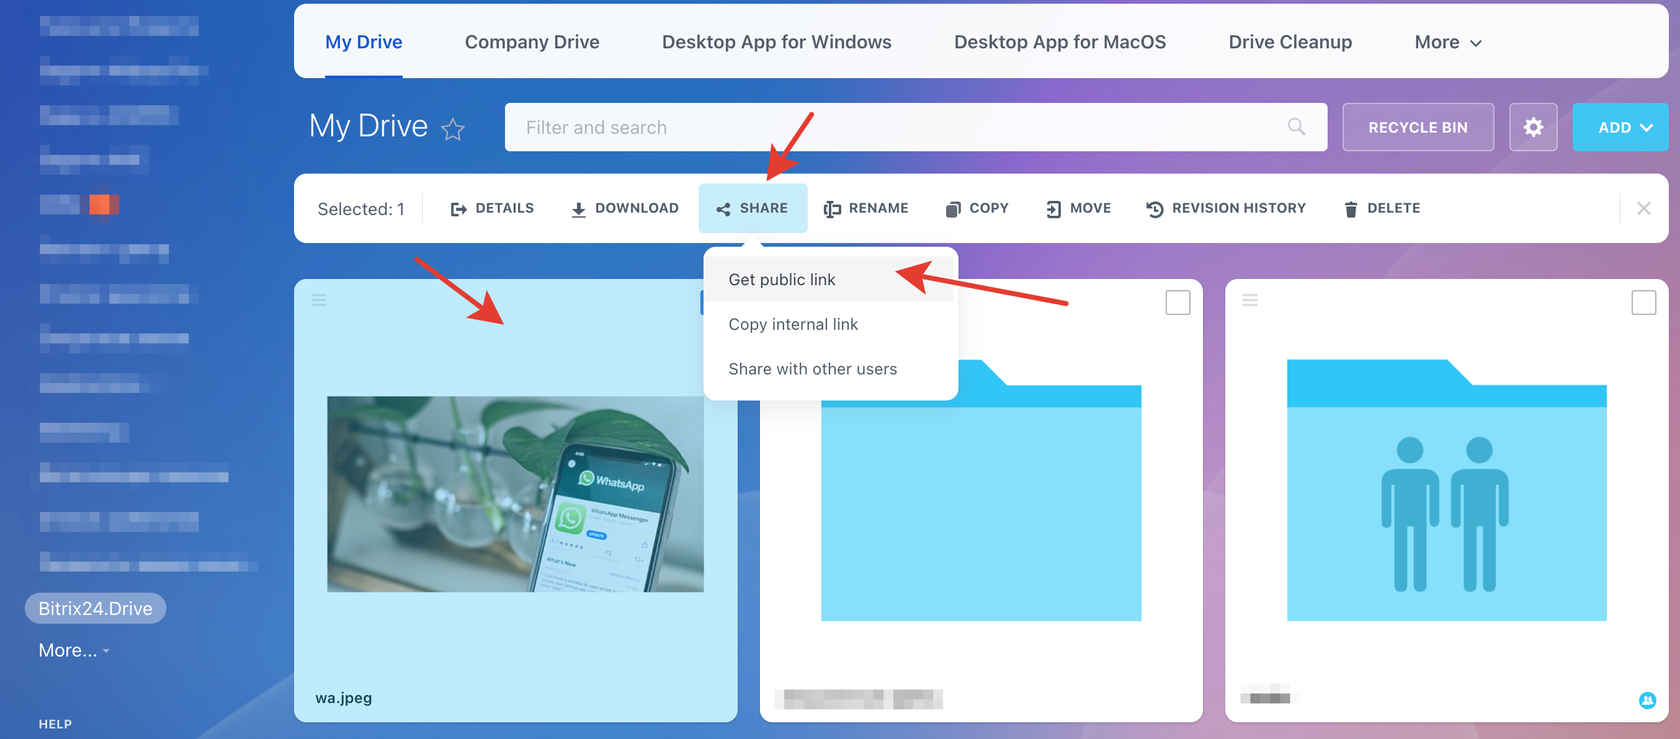
3. Copy the public link:
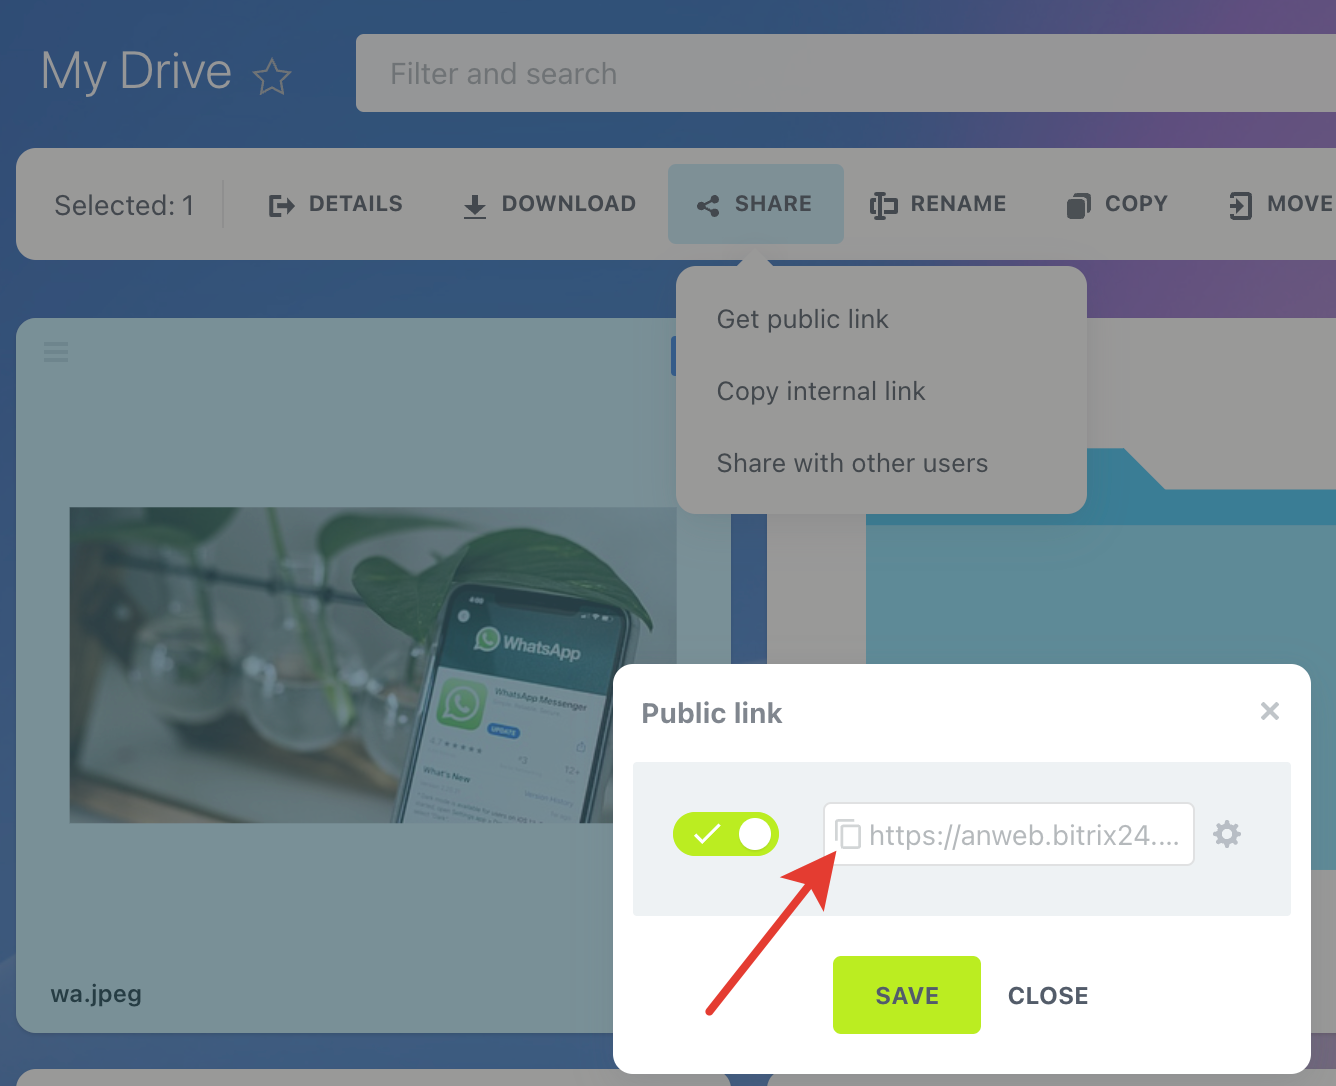
4. Open the copied link in a new browser tab and click on the image:
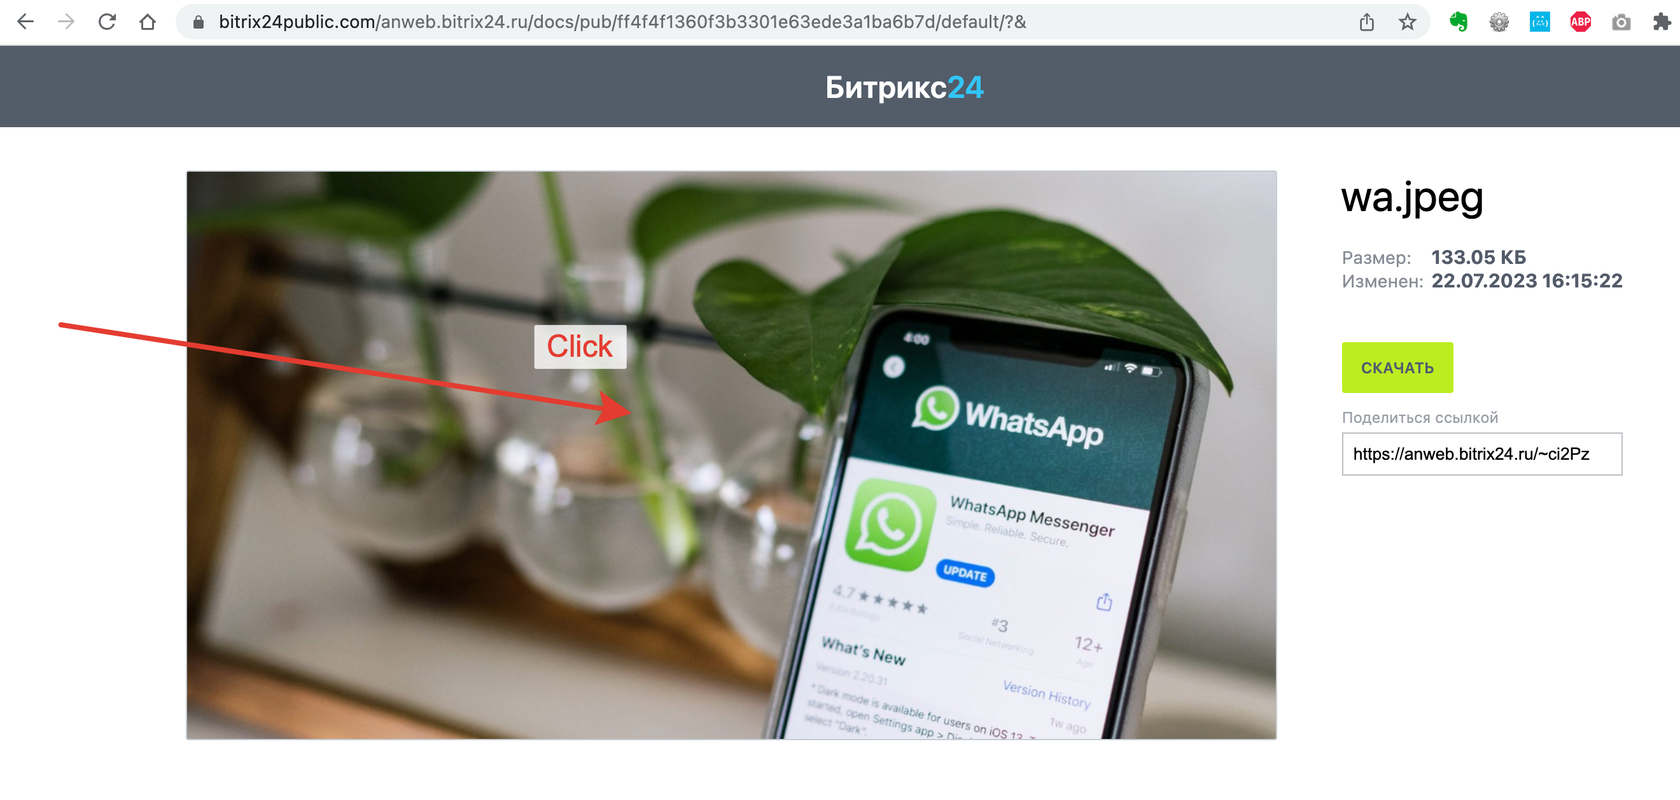
5. The desired image will open in a new tab. Copy the URL of this image:
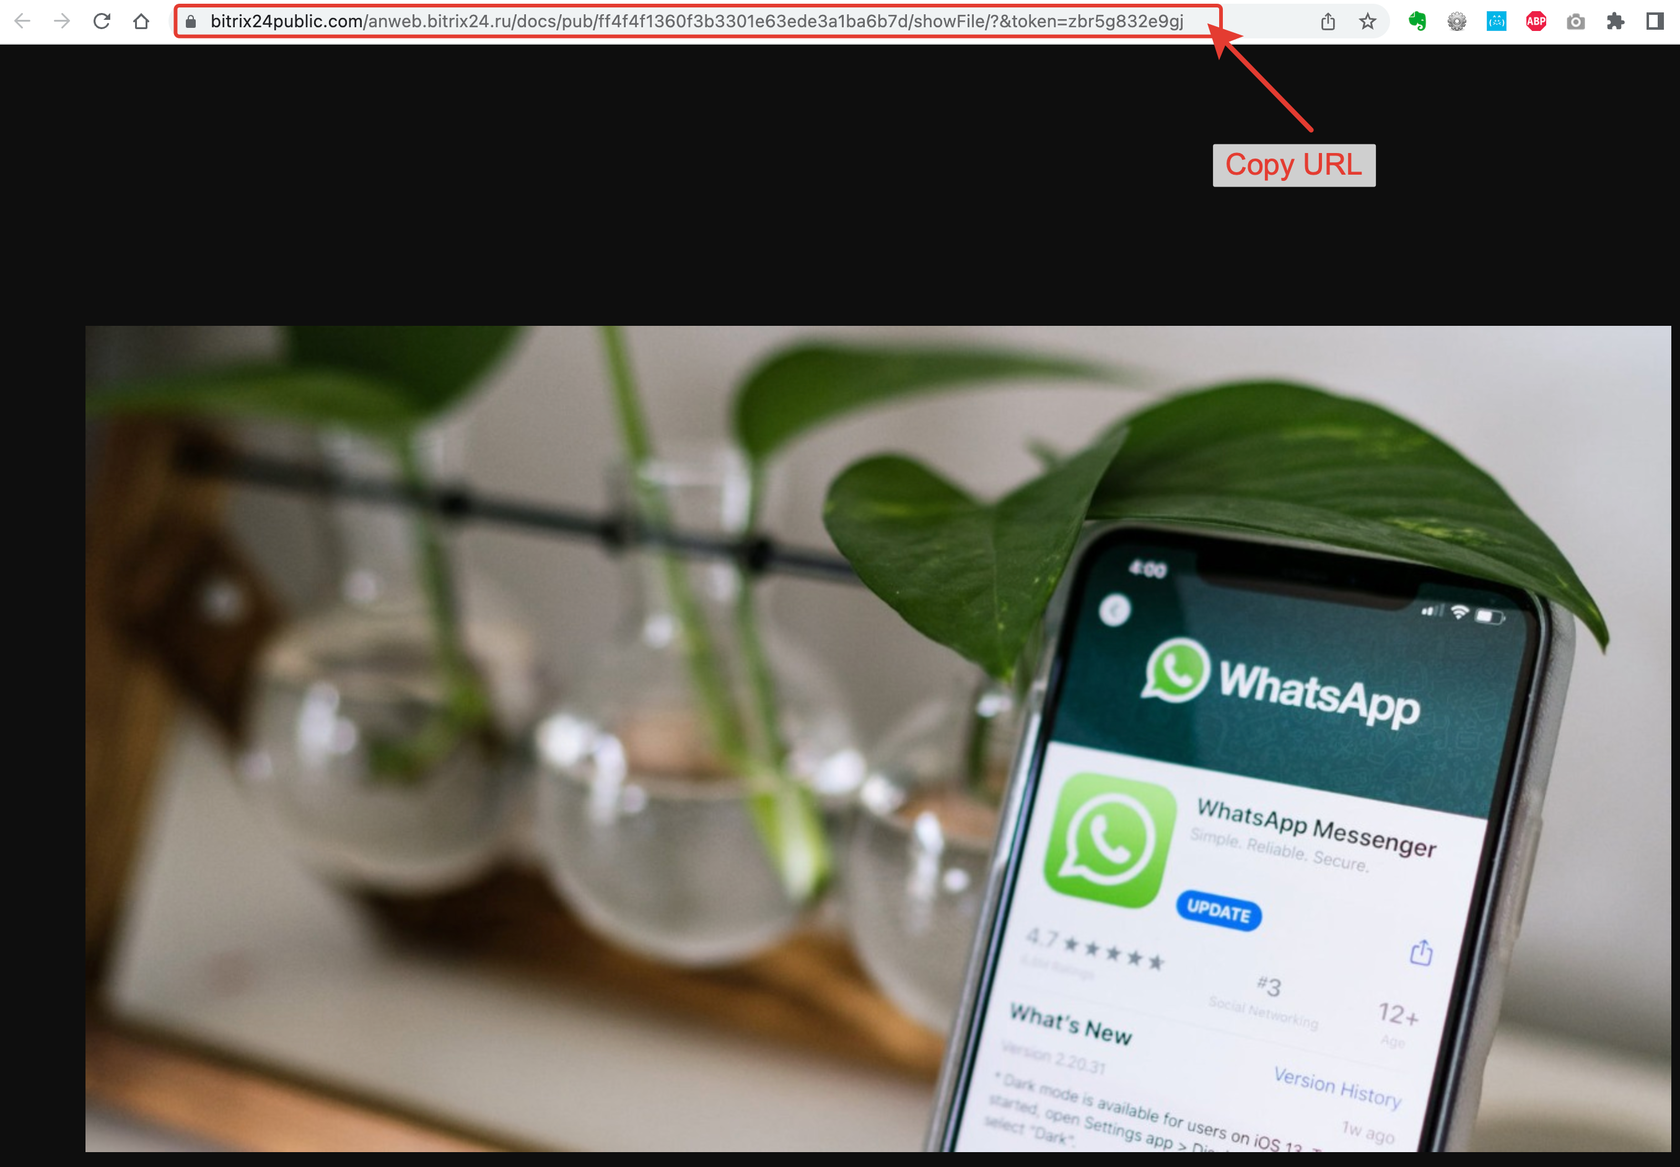
6. Paste the copied URL inside the [image]copied URL[/image] tag when submitting the template.
4. Example of sending a template message
1. Approved template:
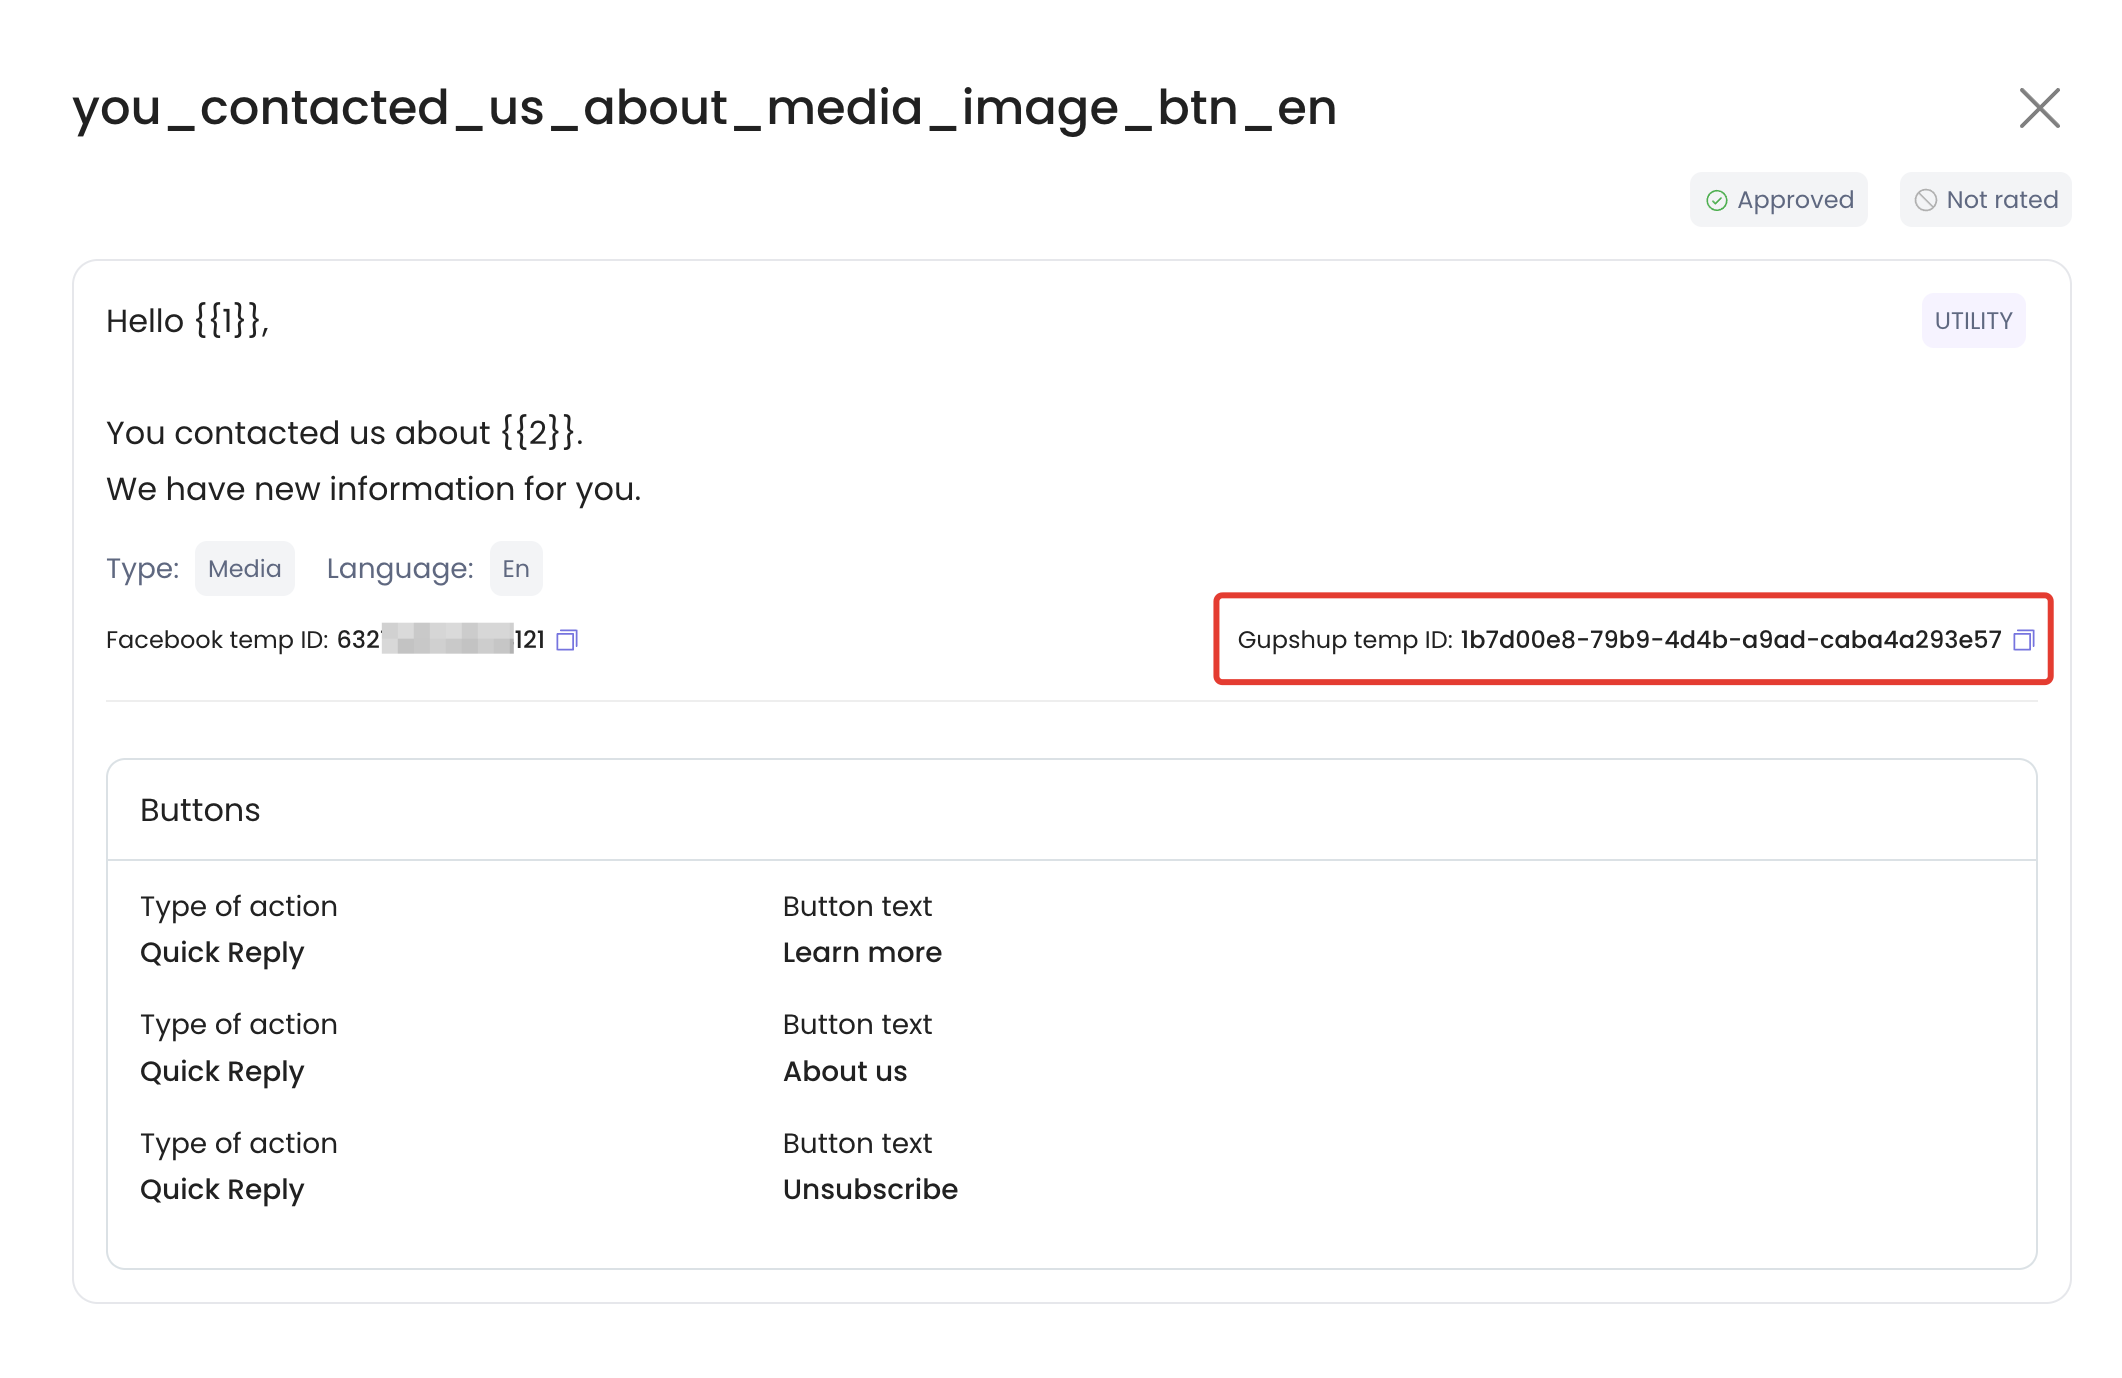
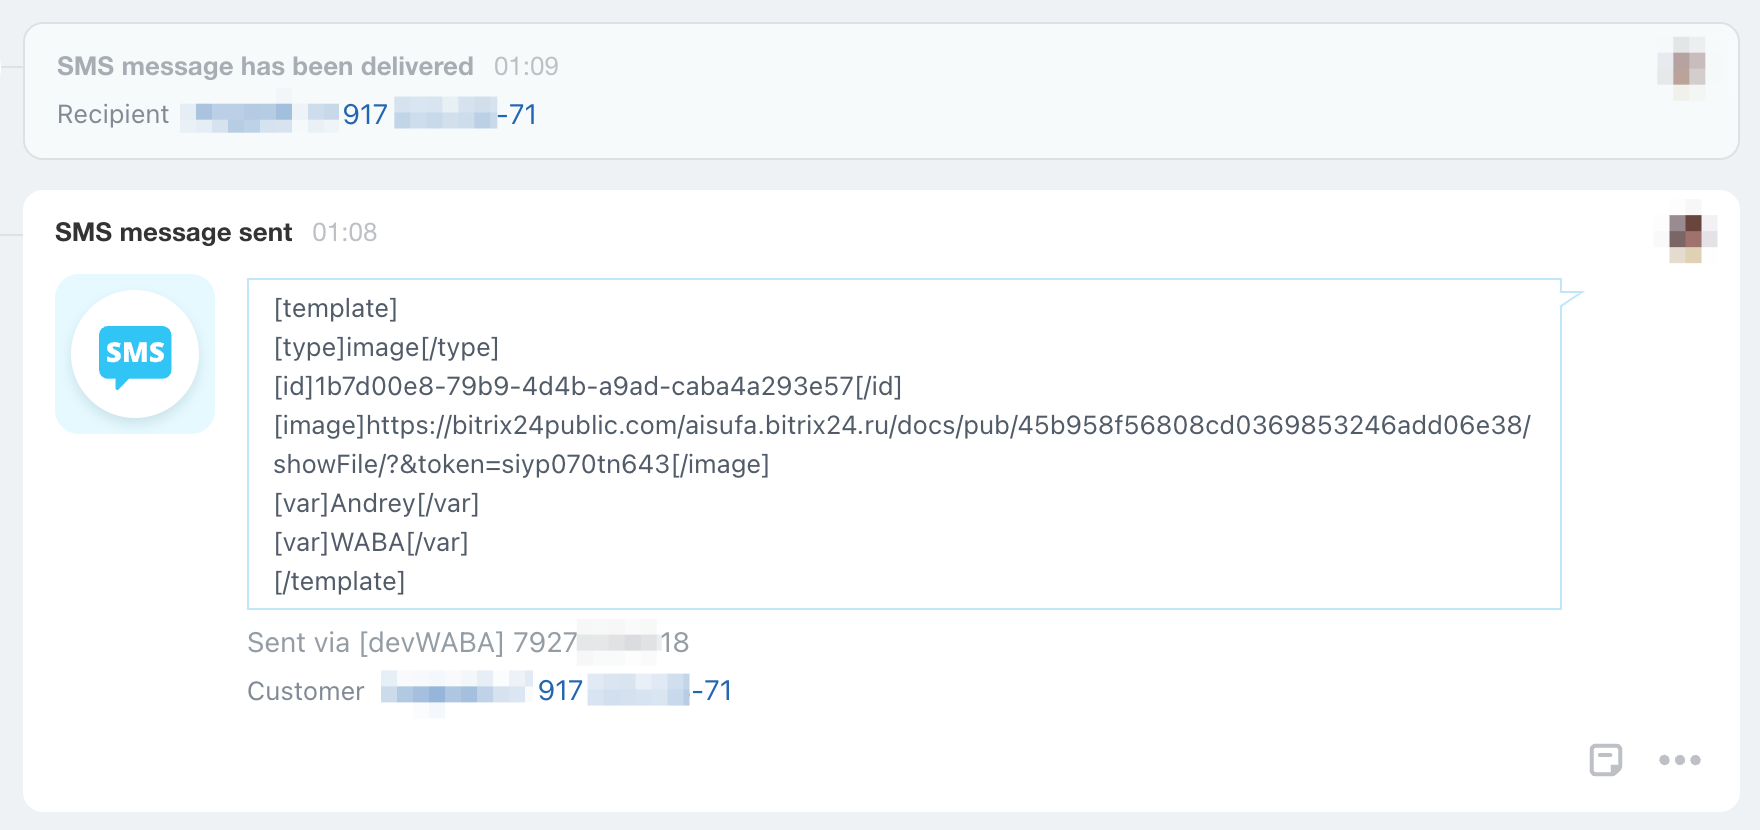
2. Text to send:
[template]
[type]image[/type]
[id]1b7d00e8-79b9-4d4b-a9ad-caba4a293e57[/id]
[image]https://bitrix24public.com/aisufa.bitrix24.ru/docs/pub/45b958f56808cd0369853246add06e38/showFile/?&token=siyp070tn643[/image]
[var]Andrey[/var]
[var]WABA[/var]
[/template]
3. Sending from Bitrix24:
4. The message that the customer will receive:
